Project 6: The HTML Tag Wrapper (Surround Simulation)
Wrap plain text lines in HTML tags using text objects, registers, and marks without plugins.
Quick Reference
| Attribute | Value |
|---|---|
| Difficulty | Level 3: Advanced |
| Time Estimate | 6-10 hours |
| Main Programming Language | HTML |
| Alternative Programming Languages | XML |
| Coolness Level | Level 3: Precision editing |
| Business Potential | 3: Front-end editor |
| Prerequisites | Insert/append commands, registers, marks |
| Key Topics | Linewise edits, registers in insert mode, marks |
1. Learning Objectives
By completing this project, you will:
- Wrap each line of text in HTML tags without plugins.
- Use
IandAto insert at line boundaries efficiently. - Use registers and
Ctrl-rin Insert mode to reuse tag text. - Use marks to jump between positions during multi-step edits.
- Build a repeatable workflow for structural wrapping.
2. All Theory Needed (Per-Concept Breakdown)
2.1 Line-Boundary Insert and Append
Fundamentals
I inserts at the first non-blank character of a line, while A appends at the end of the line. These are essential when you need to add prefixes and suffixes around existing text. In the HTML wrapper project, you will add <li> at the start of each line and </li> at the end, which maps perfectly to I and A.
Deep Dive into the concept
Line-boundary commands are faster and safer than moving manually to the beginning or end of the line. I respects indentation, which is useful when wrapping nested lists. A always moves to the line end, which is ideal for appending closing tags. When combined with . for repeat, you can wrap multiple lines with a minimal keystroke sequence.
How this fits on projects
- You will use
I<li>andA</li>for each line. - You will repeat the sequence with
j ..
Definitions & key terms
I: Insert at first non-blank character.A: Append at end of line.- Line boundary: The start or end of a line.
Mental model diagram (ASCII)
[Line text]
 ^ I inserts here
          ^ A inserts here
How it works (step-by-step)
- Move to a target line.
- Press
Ito insert prefix. - Press
<Esc>to return to Normal. - Press
Ato append suffix. - Repeat with
j ..
Minimal concrete example
I<li><Esc>A</li><Esc>
j.
Common misconceptions
- “I just use 0 and i”:
Iis faster and respects indentation. - “A is same as $a”:
Ais a single command and repeatable. - “Insert mode is slow”: Insert at boundaries minimizes movement.
Check-your-understanding questions
- What is the difference between
Iandi? - Why is
Abetter than$afor repeatability? - How do you repeat a line-boundary edit?
Check-your-understanding answers
Iinserts at first non-blank char;iinserts at cursor.Ais a single command, making dot repeat simpler.- Use
.on the next line after moving down.
Real-world applications
- Wrapping lines in tags or quotes.
- Adding comment markers at line start/end.
- Batch-editing list items.
Where you’ll apply it
- See Section 3.4 Example Usage / Output and Section 5.10 Implementation Phases in this project.
- Also used in: Project 4: Markdown Re-Sequencer.
References
:help I:help A
Key insights
Line-boundary commands turn wrapping into a two-keystroke pattern.
Summary
I and A are the fastest way to add prefix/suffix pairs to lines. They are ideal for structural wrapping tasks.
Homework/Exercises to practice the concept
- Add
*to the beginning of five lines usingI. - Append
;to the end of five lines usingAand..
Solutions to the homework/exercises
- Move line by line, use
I* <Esc>thenj .. - Use
A;<Esc>thenj ..
2.2 Registers in Insert Mode (Ctrl-r)
Fundamentals
Registers store text. In Insert mode, you can insert register contents using Ctrl-r followed by the register name. This is vital when you want to reuse the same tag multiple times without retyping. For example, you can yank <li> into register a and insert it repeatedly.
Deep Dive into the concept
Insert-mode register paste is efficient because it avoids leaving Insert mode. You can use the unnamed register (") or named registers ("a, "b). This means you can keep multiple tag snippets ready. The deeper skill is understanding how registers are overwritten: deletes and yanks replace the unnamed register, but named registers persist until overwritten. This allows you to protect your tag snippets while editing.
How this fits on projects
- You will use
Ctrl-rto insert repeated tag text. - You will store tags in a named register to avoid overwrite.
Definitions & key terms
- Register: Storage slot for text.
- Insert-mode paste:
Ctrl-rfollowed by a register name. - Unnamed register: Default register overwritten by deletes/yanks.
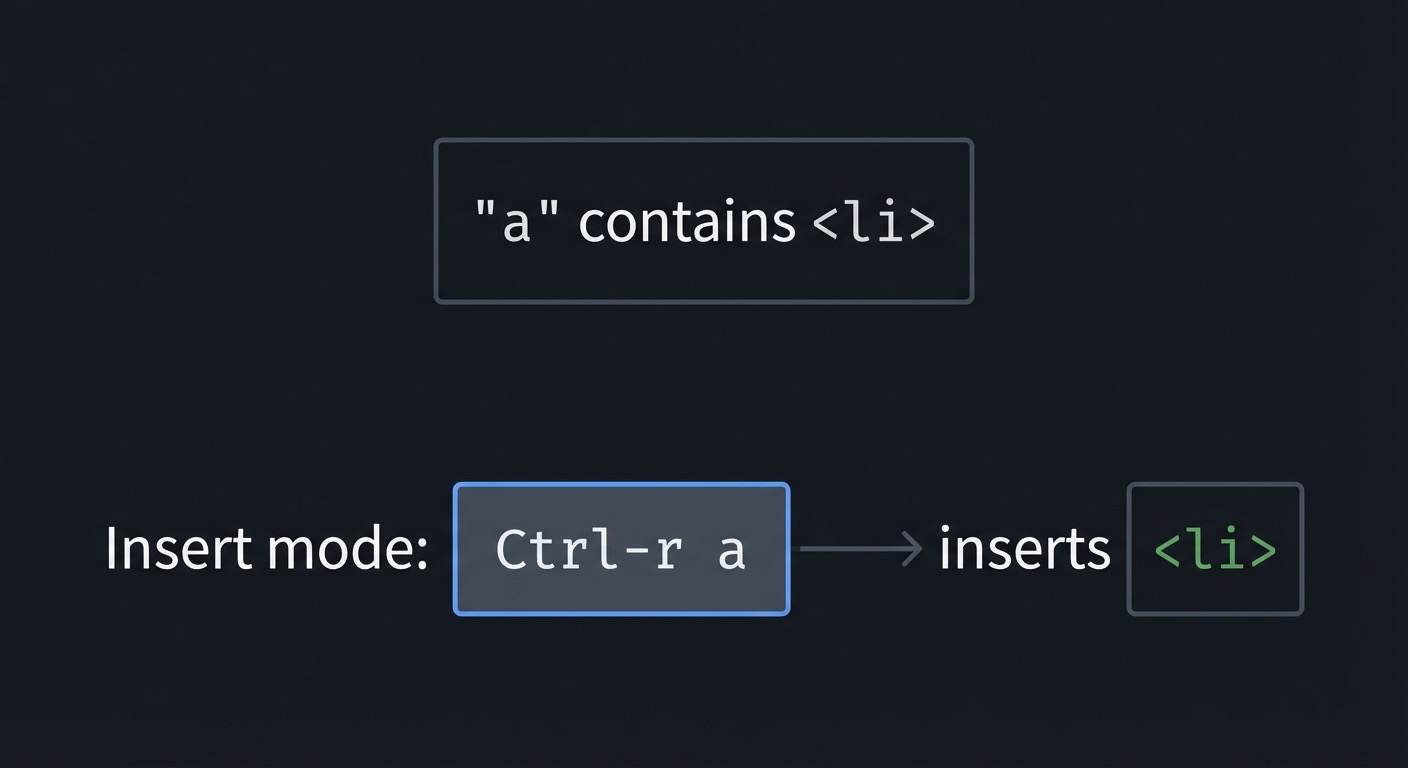
Mental model diagram (ASCII)
"a contains <li>
Insert mode: Ctrl-r a -> inserts <li>
How it works (step-by-step)
- Yank the tag into a named register:
"ayy. - Enter Insert mode at the desired location.
- Press
Ctrl-rthenato insert. - Continue editing without leaving Insert mode.
Minimal concrete example
"ayiw          " yank word into register a
I<C-r>a<Esc>   " insert register a at line start
Common misconceptions
- “Registers only matter for macros”: They are crucial for repeated text.
- “Insert mode cannot paste”:
Ctrl-rworks in Insert mode. - “Unnamed register is safe”: It is overwritten often.
Check-your-understanding questions
- How do you paste register
ain Insert mode? - Why use named registers instead of the unnamed register?
- What happens to the unnamed register after a delete?
Check-your-understanding answers
Ctrl-r a.- Named registers are preserved; unnamed is overwritten.
- It is replaced by the deleted text.
Real-world applications
- Reusing HTML tags or snippets.
- Inserting boilerplate text quickly.
- Copying consistent prefixes across lines.
Where you’ll apply it
- See Section 3.7 Real World Outcome and Section 5.8 Hints in Layers in this project.
- Also used in: Project 5: Log Parser.
References
:help i_CTRL-R- “Practical Vim” Ch. 10
Key insights
Registers turn repeated typing into a single keystroke.
Summary
Insert-mode register paste is a precision tool for repeated text. It keeps you in flow and avoids retyping.
Homework/Exercises to practice the concept
- Yank
<li>into registeraand insert it on three lines. - Store
</li>in registerband paste it at line ends.
Solutions to the homework/exercises
"ayiW, thenI<C-r>a<Esc>."byiW, thenA<C-r>b<Esc>.
2.3 Marks and Jumping Between Positions
Fundamentals
Marks let you save a location and jump back to it. Use ma to set mark a, then jump to it with 'a (line) or `a (exact position). This is useful when you need to add opening and closing tags at different places (like wrapping a list with <ul> and </ul>).
Deep Dive into the concept
Marks are especially useful in multi-step edits where you need to return to a specific point after moving elsewhere. In the HTML wrapper project, you might set a mark at the top of the list, move to the bottom to insert </ul>, then jump back to insert <ul> at the start. Marks reduce the mental load of navigation, making your edits more reliable.
How this fits on projects
- You will use marks to jump between the top and bottom of a list.
- You will use exact-position jumps to avoid losing context.
Definitions & key terms
- Mark: A named location in the buffer.
- Line mark (
'a): Jump to the marked line. - Exact mark (
`a): Jump to the exact column.
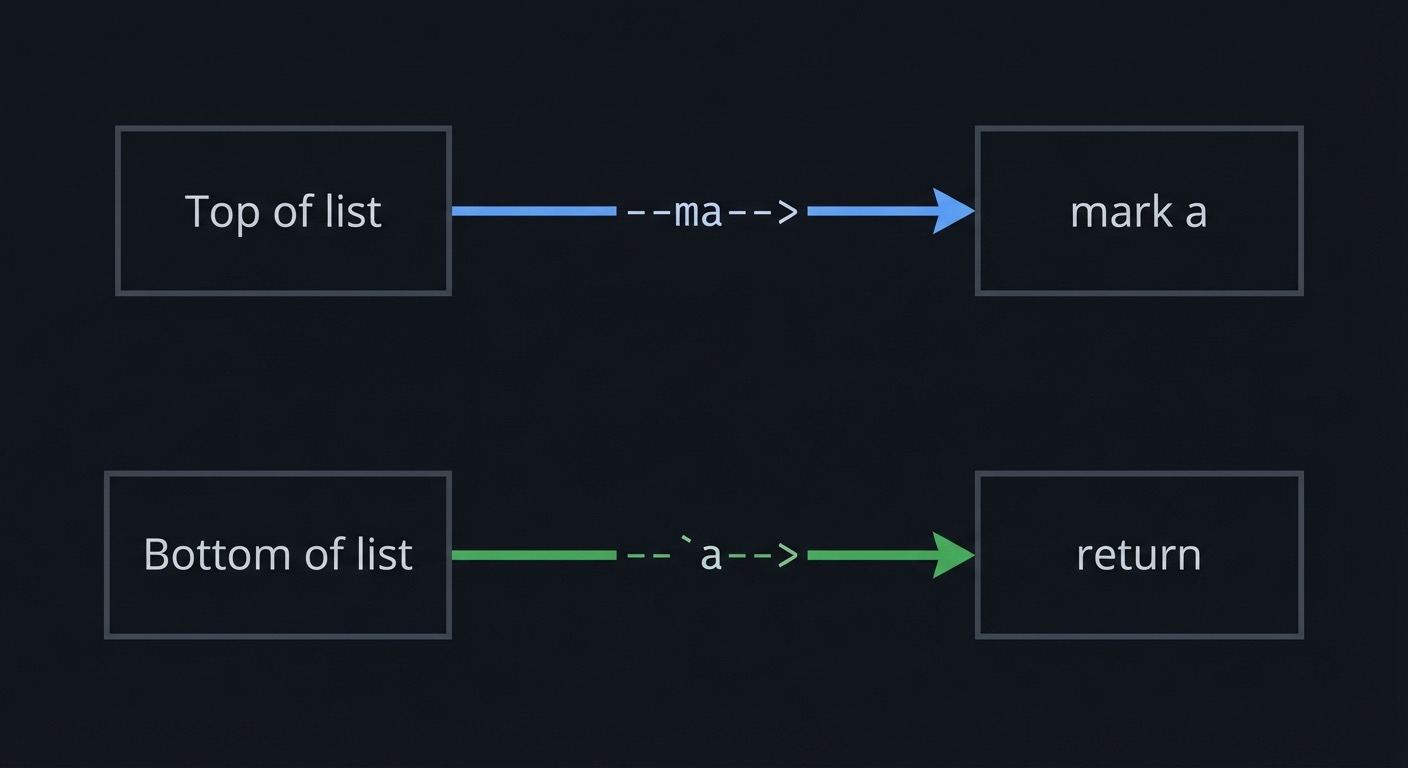
Mental model diagram (ASCII)
Top of list --ma--> mark a
Bottom of list --`a--> return
How it works (step-by-step)
- Set a mark with
ma. - Move elsewhere in the file.
- Return with
`aor'a. - Continue editing from the marked position.
Minimal concrete example
ma
G
O</ul><Esc>
`a
O<ul><Esc>
Common misconceptions
- “Marks are temporary”: They persist until overwritten.
- “You only need marks in big files”: They help even in small edits.
- “
aand ‘a are the same”: One is exact, one is line-based.
Check-your-understanding questions
- What is the difference between
'aand`a? - How do you set a mark?
- Why are marks useful for paired edits?
Check-your-understanding answers
'ajumps to the line;`ajumps to the exact column.- Use
mfollowed by a letter. - They let you return to a known position quickly.
Real-world applications
- Wrapping sections with tags.
- Jumping between related code blocks.
- Placing anchors for navigation.
Where you’ll apply it
- See Section 3.7 Real World Outcome and Section 5.10 Implementation Phases in this project.
- Also used in: Project 9: Code Navigator.
References
:help mark- “Learning the vi and Vim Editors” Ch. 3
Key insights
Marks are bookmarks for editing, not just navigation.
Summary
Marks give you reliable jump points, which is essential for multi-step structural edits.
Homework/Exercises to practice the concept
- Set a mark at the top of a list, jump to the bottom, then return.
- Use marks to insert paired tags at two locations.
Solutions to the homework/exercises
ma,G,`a.- Set mark, insert closing tag, return, insert opening tag.
3. Project Specification
3.1 What You Will Build
You will take a list of plain lines and wrap each line in <li> tags, then wrap the list in <ul> tags. The deliverable is a before/after file plus a command log.
3.2 Functional Requirements
- Input File: Create
list.txtwith at least 10 lines. - Line Wrapping: Use
IandAto add<li>and</li>. - Outer Tags: Insert
<ul>and</ul>using marks. - Register Usage: Use at least one named register with
Ctrl-r. - Command Log: Record key sequences.
3.3 Non-Functional Requirements
- Consistency: Every line is wrapped correctly.
- Repeatability: Use
j .to repeat edits where possible. - Clarity: Output HTML is readable and indented.
3.4 Example Usage / Output
Before:
Apples
Oranges

Commands:
I<li><Esc>A</li><Esc>
j.

After:
<li>Apples</li>
<li>Oranges</li>
3.5 Data Formats / Schemas / Protocols
Plain text list input. Output is valid HTML:
<ul>
  <li>Apples</li>
  <li>Oranges</li>
</ul>
3.6 Edge Cases
- Empty lines in the list.
- Lines with leading/trailing spaces.
- Very long list items.
3.7 Real World Outcome
You will produce a valid HTML list with clean tags and consistent indentation.
3.7.1 How to Run (Copy/Paste)
vim list.txt
3.7.2 Golden Path Demo (Deterministic)
- On first line:
I<li><Esc>A</li><Esc>. - On next line:
j .. - Insert
<ul>and</ul>using marks.
Expected output:
<ul>
<li>Apples</li>
<li>Oranges</li>
</ul>
3.7.3 Failure Demo (Deterministic)
If you forget <Esc> between I and A, you will insert the closing tag at the wrong location, producing malformed HTML.
3.7.4 If CLI
Not applicable.
3.7.5 If Web App
Not applicable.
3.7.6 If API
Not applicable.
3.7.7 If Library
Not applicable.
3.7.8 If TUI
+------------------------------+
| list.txt                     |
| Apples                       |
| Oranges                      |
|                              |
| -- NORMAL --                 |
+------------------------------+
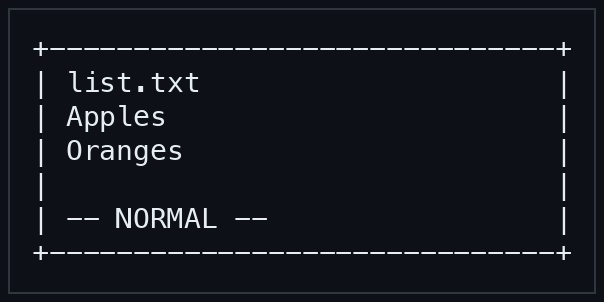
Key interactions:
IandAfor wrappingCtrl-rfor register pastemato set a mark and`ato jump back
4. Solution Architecture
4.1 High-Level Design
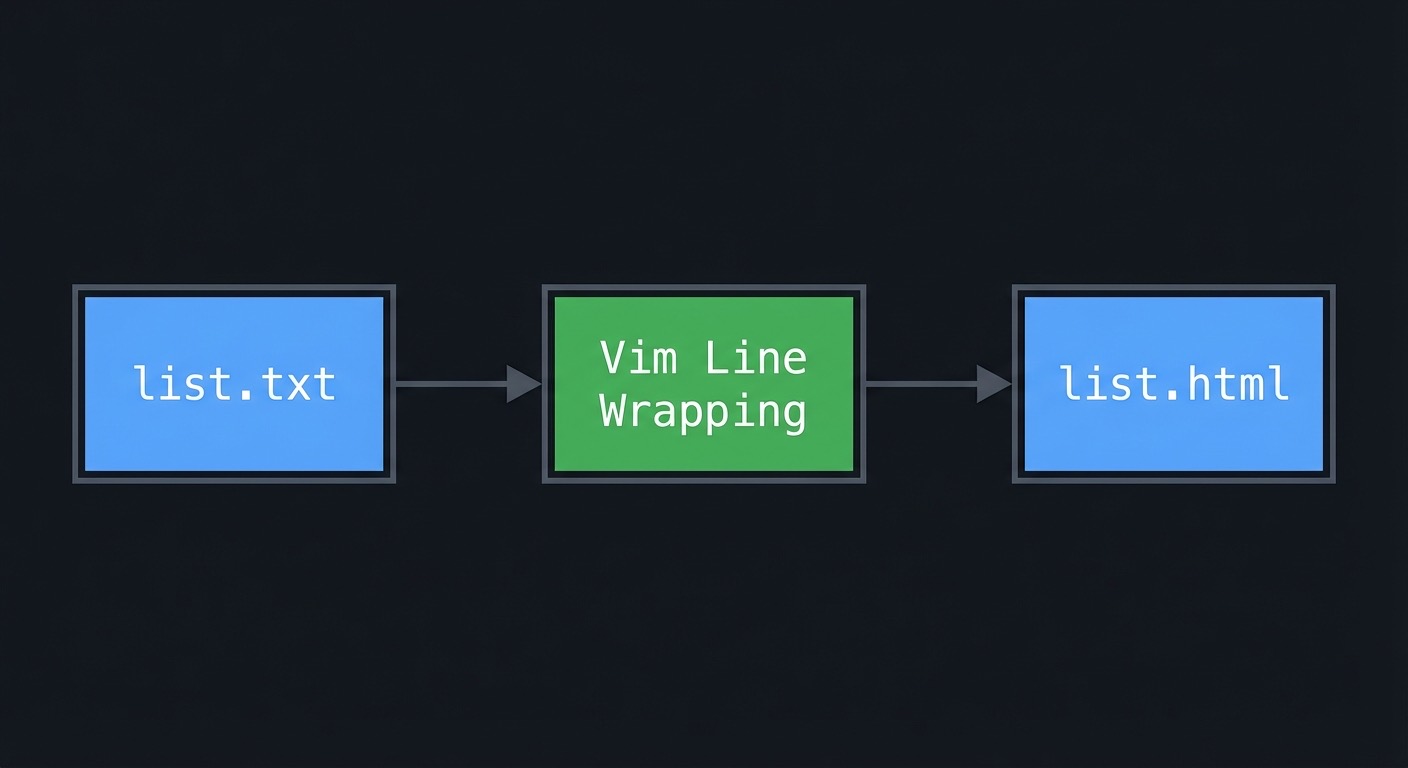
+-----------+    +-------------------+    +-----------+
| list.txt  | -> | Vim Line Wrapping | -> | list.html |
+-----------+    +-------------------+    +-----------+
4.2 Key Components
| Component | Responsibility | Key Decisions |
|---|---|---|
| Input file | Provide list lines | At least 10 items |
| Wrapping sequence | Insert tags | Use I and A |
| Marks | Jump between boundaries | Use ma and `a |
4.3 Data Structures (No Full Code)
WrapStep:
- insert_prefix
- insert_suffix
- repeat_next_line
4.4 Algorithm Overview
Key Algorithm: Line Wrapper
- Insert
<li>at line start. - Append
</li>at line end. - Move down and repeat.
Complexity Analysis:
- Time: O(k) per line
- Space: O(1)
5. Implementation Guide
5.1 Development Environment Setup
vim --version
5.2 Project Structure
html-wrapper/
|-- list.txt
|-- list.html
`-- command_log.md
5.3 The Core Question You’re Answering
“How do I wrap text in structure without plugins?”
5.4 Concepts You Must Understand First
IandAfor line boundary edits- Registers and
Ctrl-r - Marks for jumping
5.5 Questions to Guide Your Design
- Should I store the tag text in a register?
- Where should I set marks to add
<ul>boundaries? - How do I repeat line wrapping efficiently?
5.6 Thinking Exercise
Find the shortest repeatable sequence to wrap five lines with <p> tags.
5.7 The Interview Questions They’ll Ask
- “How do you paste from a register in Insert mode?”
- “What is the difference between
'aand`a?” - “What does
Ido?”
5.8 Hints in Layers
Hint 1: Use I and A
They map directly to prefix/suffix edits.
Hint 2: Use registers
Store <li> and </li> in named registers.
Hint 3: Use marks Set a mark at the top before jumping to the bottom.
Hint 4: Repeat with .
j . repeats the last line-wrap.
5.9 Books That Will Help
| Topic | Book | Chapter |
|---|---|---|
| Insert mode | “Practical Vim” | Ch. 3 |
| Registers | “Practical Vim” | Ch. 10 |
| Marks | “Learning the vi and Vim Editors” | Ch. 3 |
5.10 Implementation Phases
Phase 1: Prepare Input (1-2 hours)
Goals:
- Create a list with 10+ items.
Tasks:
- Write
list.txtwith sample items. - Add blank lines to test edge cases.
Checkpoint: File opens cleanly in Vim.
Phase 2: Wrap Lines (2-4 hours)
Goals:
- Wrap each line in
<li>tags.
Tasks:
- Wrap first line with
I<li>andA</li>. - Repeat with
j ..
Checkpoint: All lines are wrapped correctly.
Phase 3: Add Outer Tags (1-2 hours)
Goals:
- Add
<ul>and</ul>.
Tasks:
- Set a mark at top.
- Jump to bottom and insert
</ul>. - Jump back and insert
<ul>.
Checkpoint: HTML list is valid.
5.11 Key Implementation Decisions
| Decision | Options | Recommendation | Rationale |
|---|---|---|---|
| Tag insertion | Manual typing / registers | Registers | Faster and safer |
| Outer tag placement | Manual search / marks | Marks | Precise jumping |
| Indentation | None / manual | Manual (2 spaces) | Readability |
6. Testing Strategy
6.1 Test Categories
| Category | Purpose | Examples |
|---|---|---|
| Structural correctness | Tags match pairs | Validate HTML visually |
| Repeatability | j . works |
Wrap 5 lines quickly |
| Edge cases | Empty lines | Ensure no blank tags |
6.2 Critical Test Cases
- Line with leading whitespace.
- Empty line (should be skipped or wrapped deliberately).
- Very long line with punctuation.
6.3 Test Data
Apples
Oranges

Bananas
7. Common Pitfalls & Debugging
7.1 Frequent Mistakes
| Pitfall | Symptom | Solution |
|---|---|---|
Missing <Esc> |
Closing tag in wrong place | Always return to Normal mode |
| Wrong register | Inserted incorrect tag | Use named registers |
| Lost position | Inserted <ul> in wrong spot |
Use marks to return |
7.2 Debugging Strategies
- Undo and redo with a cleaner sequence.
- Use
:set showmodeto verify mode transitions.
7.3 Performance Traps
- Moving to line ends manually instead of using
A. - Retyping tags instead of using registers.
8. Extensions & Challenges
8.1 Beginner Extensions
- Wrap lines with
<p>tags. - Indent the wrapped list by two spaces.
8.2 Intermediate Extensions
- Convert the list into an ordered list (
<ol>). - Use a macro to wrap lines automatically.
8.3 Advanced Extensions
- Wrap paragraphs with
<section>tags. - Use marks and registers to wrap nested lists.
9. Real-World Connections
9.1 Industry Applications
- Quick HTML structuring in static sites.
- Converting text exports into HTML lists.
9.2 Related Open Source Projects
- Static site generators that consume Markdown/HTML.
- Vim users building HTML without plugins.
9.3 Interview Relevance
- Demonstrates precision editing and workflow design.
10. Resources
10.1 Essential Reading
- “Practical Vim” Ch. 3 and 10
- “Learning the vi and Vim Editors” Ch. 3
10.2 Video Resources
- Vim registers and marks tutorials
10.3 Tools & Documentation
:help I:help i_CTRL-R:help mark
10.4 Related Projects in This Series
11. Self-Assessment Checklist
11.1 Understanding
- I can explain
Ivsi. - I can paste a register in Insert mode.
- I can jump to marks reliably.
11.2 Implementation
- All lines wrapped with
<li>tags. <ul>and</ul>added correctly.- Command log completed.
11.3 Growth
- I can apply the same workflow to XML or Markdown.
- I can explain the workflow to a teammate.
12. Submission / Completion Criteria
Minimum Viable Completion:
- Wrapped 10+ lines in
<li>tags without plugins. - Added
<ul>and</ul>using marks. - Used at least one named register.
Full Completion:
- All minimum criteria plus:
- Used
j .to wrap at least 5 lines. - Indented the list cleanly.
Excellence (Going Above & Beyond):
- Wrapped nested lists and maintained indentation.
- Created a reusable sequence documented in the log.