Vim Motions Mastery - Real World Projects
Goal: Build a reflex-level understanding of Vim’s editing language so you can move, select, and transform text by intent rather than by manual selection. You will internalize modal editing, the operator + motion grammar, text objects, search/find, repeatability, registers, and automation so edits become tiny, composable sentences. By the end, you will be able to refactor code, restructure data, and clean logs with a handful of commands, and you will have a minimal, portable Vim configuration that supports these workflows across machines. The projects force you to confront real editing constraints: messy data, repetitive changes, and navigation through large files.
Introduction
- What is Vim motions? The movement and selection primitives that let you target text by meaning (word, sentence, block, structure) instead of by coordinates.
- What problem does it solve today? It makes editing fast, precise, and repeatable in any terminal, especially on servers, large codebases, or low-resource systems.
- What will you build across the projects? Navigation drills, JSON/HTML refactors, log parsers, macro-based transformations, and a practical
.vimrcworkflow. - In scope: motions, text objects, operators, search/find, repeatability, registers, marks, macros, Ex commands, tags, and minimal configuration.
- Out of scope: plugin ecosystems, full Vimscript development, IDE integration, GUI-only features.
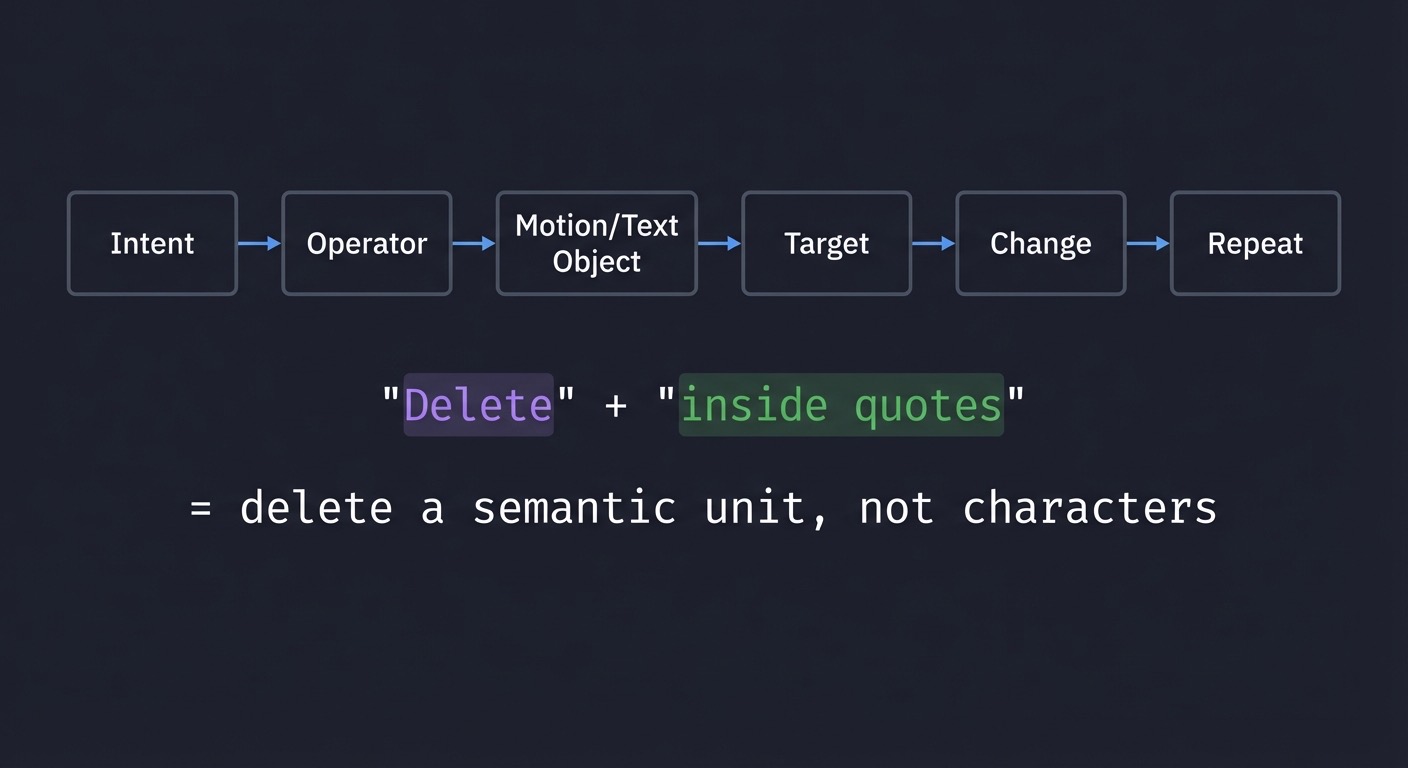
Big picture editing grammar
Intent -> Operator -> Motion/Text Object -> Target -> Change -> Repeat
  "Delete"  + "inside quotes"         = delete a semantic unit, not characters
How to Use This Guide
- Read the Theory Primer in order. Each chapter builds a mental model you will reuse.
- Pick a learning path that matches your time and goals (see Recommended Learning Paths).
- After each project, re-read the relevant concept chapters and do the exercises.
- Validate progress using the Definition of Done in each project.
- Keep
:helpopen; Vim’s help is part of the tool.
Prerequisites & Background Knowledge
Essential Prerequisites (Must Have)
- Comfortable in a terminal (open files, navigate directories, run commands).
- Basic understanding of files, buffers, and text editing.
- Able to open, save, and quit a file in Vim.
- Recommended Reading: “Practical Vim” by Drew Neil - Ch. 1-2.
Helpful But Not Required
- Regular expression basics (learn during Projects 5 and 10).
- Familiarity with a programming language (any) for refactoring exercises.
- Experience with
grep/ripgrep(useful for project validation).
Self-Assessment Questions
- Can you open a file in Vim and exit without force-quitting?
- Can you explain the difference between Normal and Insert mode?
- Do you know how to search forward and backward in Vim?
- Can you describe the difference between a word and a line?
- Can you repeat your last change without retyping it?
Development Environment Setup Required Tools:
- Vim 9+ or Neovim (any recent version)
- A terminal emulator (Terminal, iTerm2, Windows Terminal, etc.)
Recommended Tools:
ripgreporgrepfor searching projects- Universal Ctags for Project 9
- A monospace font with clear punctuation
Testing Your Setup:
$ vim --version
VIM - Vi IMproved 9.x

$ vimtutor
# should open the built-in tutorial
Time Investment
- Simple projects: 4-8 hours each
- Moderate projects: 10-20 hours each
- Complex projects: 20-40 hours each
- Total sprint: 2-3 months (part-time)
Important Reality Check Vim mastery is not memorizing shortcuts. It is building a language reflex. Expect an initial slowdown, then a sudden speed increase as the grammar becomes automatic. If you feel clumsy, that is expected and temporary.
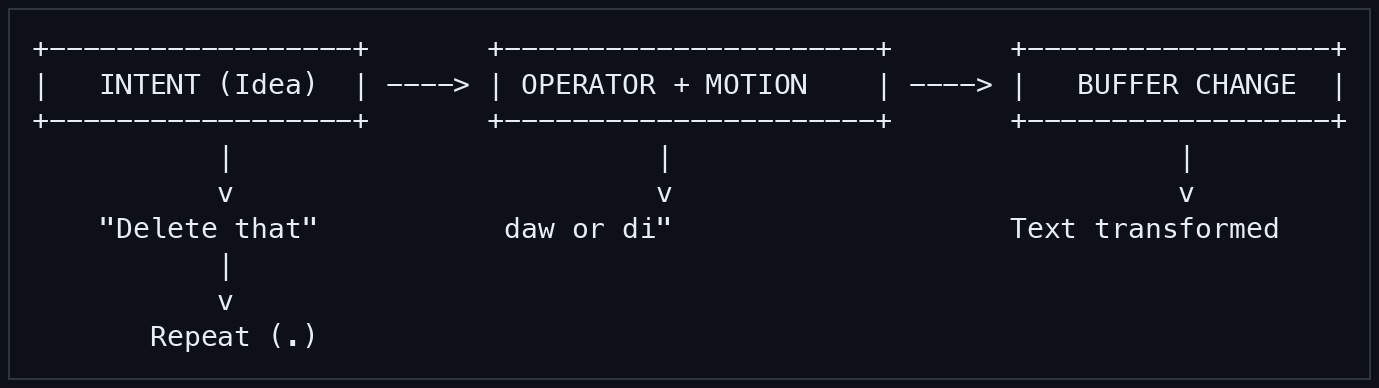
Big Picture / Mental Model
Vim is a state machine + grammar engine. You design an edit (operator + motion), execute it, then repeat it. Every command fits into this loop.
+------------------+       +----------------------+       +------------------+
|   INTENT (Idea)  | ----> | OPERATOR + MOTION    | ----> |   BUFFER CHANGE  |
+------------------+       +----------------------+       +------------------+
           |                         |                              |
           v                         v                              v
    "Delete that"           daw or di"                    Text transformed
           |
           v
       Repeat (.)
Modes are the control plane:
Normal (default)
  | i / a / o
  v
Insert  <Esc> -> Normal
  |
  | v / V / Ctrl-v
  v
Visual <Esc> -> Normal
  |
  | : / / ?
  v
Command-line <Enter>/<Esc> -> Normal
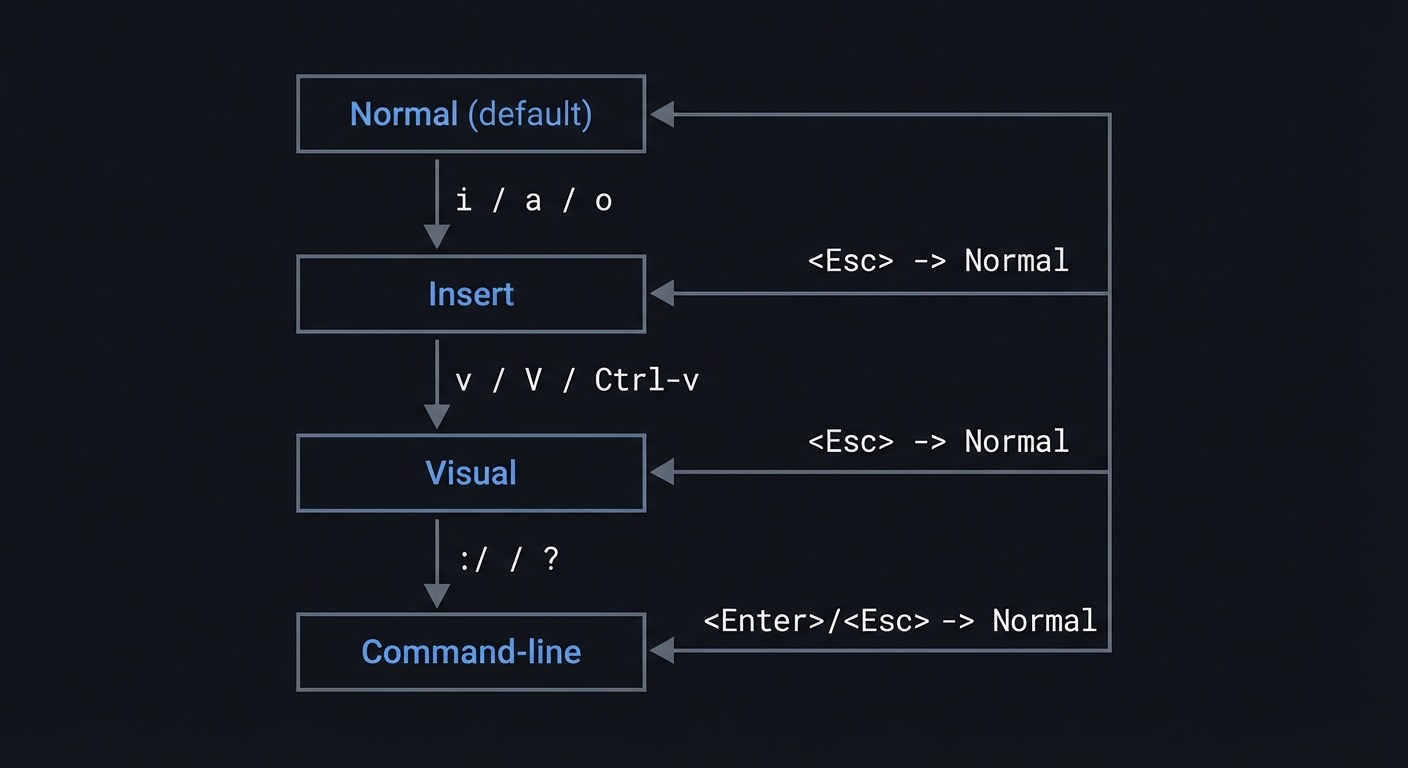
Keep this mental model in your head. Every command maps to it.
Theory Primer
Chapter 1: Modal Editing and the State Machine
Fundamentals
Modal editing means the same keys do different things depending on mode. In Vim, Normal mode is the default, Insert mode is for typing text, Visual mode is for selection, and Command-line mode is for Ex commands and searches. This design turns editing into a deliberate act: first you decide the action, then you execute it. Instead of constantly typing characters, you spend most time in Normal mode planning edits with small commands. This is why Esc is central: it is the exit door back to power. Understanding modes prevents accidental edits and reduces mental friction, because your hands can focus on intent rather than cursor micromanagement.
Another way to view modes is as a safety system: Normal mode protects the buffer from accidental input, Insert mode is for deliberate text, and Visual/Command-line are for scoped operations. Building the habit of returning to Normal after each change reduces errors and creates consistent command history for repeatability. This habit is more important than raw speed.
Deep Dive Think of Vim as a state machine with a small number of stable states and explicit transitions. Normal mode is the hub because it is where navigation, operators, and composition live. Insert mode is intentionally narrow: its job is to capture text, not to decide structure. Visual mode is a bridge for selection when a precise motion is difficult or when you want to see the selection. Command-line mode is a miniature language that applies batch operations. Replace mode is a specialized insert variant. The key insight is that Vim optimizes for editing intent, not for continuous typing. This architecture reduces the need to hold mental state about selections because selections can be reconstructed by motions. A modal editor also makes the keyboard a dense command surface: you do not need chords for common tasks because the same key can mean different commands in different modes. The cost is the learning curve and the requirement to explicitly manage state.
The state machine model explains common failures. If you accidentally insert when you meant to delete, you were in the wrong state. If a command does nothing, you are likely in the wrong mode. This is why Vim shows mode indicators and why :set showmode or a statusline is helpful. Practically, you should build a reflex: after any change, return to Normal mode unless you are actively typing. This supports repeatability and dot command usage, because the last change is captured cleanly when it starts and ends in Normal mode.
Modal editing also reshapes your editing strategy. Instead of “select then act,” Vim encourages “act on a motion.” That mental shift is the cornerstone of speed. If you are used to GUI editors, Visual mode will feel natural at first, but it is a crutch; over time, you should prefer operator + motion because it is more repeatable. This does not mean Visual mode is useless; it is a tool for irregular selections and for learning. The long-term goal is to reduce reliance on it. Modes also create a clean mental boundary for automation: macros and repeatability assume you start in Normal mode. A macro recorded from the wrong mode often fails on replay.
The state machine can be made explicit in your workflow. For example, when you need to make a change, you can silently say: “Normal mode, operator, motion, return.” When you need to enter data, you can say: “Insert mode, type, exit.” This is not just pedagogy; it mirrors how your hands should operate. The repeat key, search, and jump list all assume you return to Normal, and they become consistent when you do. Finally, modal editing is why Vim feels fast over a remote connection: the commands are short and the mode switches are deterministic. You send small commands rather than large selections, which reduces bandwidth and cognitive load.
Two practical details help during training: Ctrl-[ is an alternative to <Esc> and is useful on compact keyboards, and :set showmode or a statusline makes state visible. A common failure mode is recording a macro while still in Insert mode, which makes replays diverge. Always ensure you are in Normal mode before starting a macro or repeatable change to keep state transitions clean.
How this fit on projects Every project assumes you can intentionally switch modes, operate in Normal by default, and return to Normal after actions.
Definitions & key terms
- Normal mode: command and navigation mode
- Insert mode: text input mode
- Visual mode: selection mode
- Command-line mode: Ex and search input
- Replace mode: overwrite characters while typing
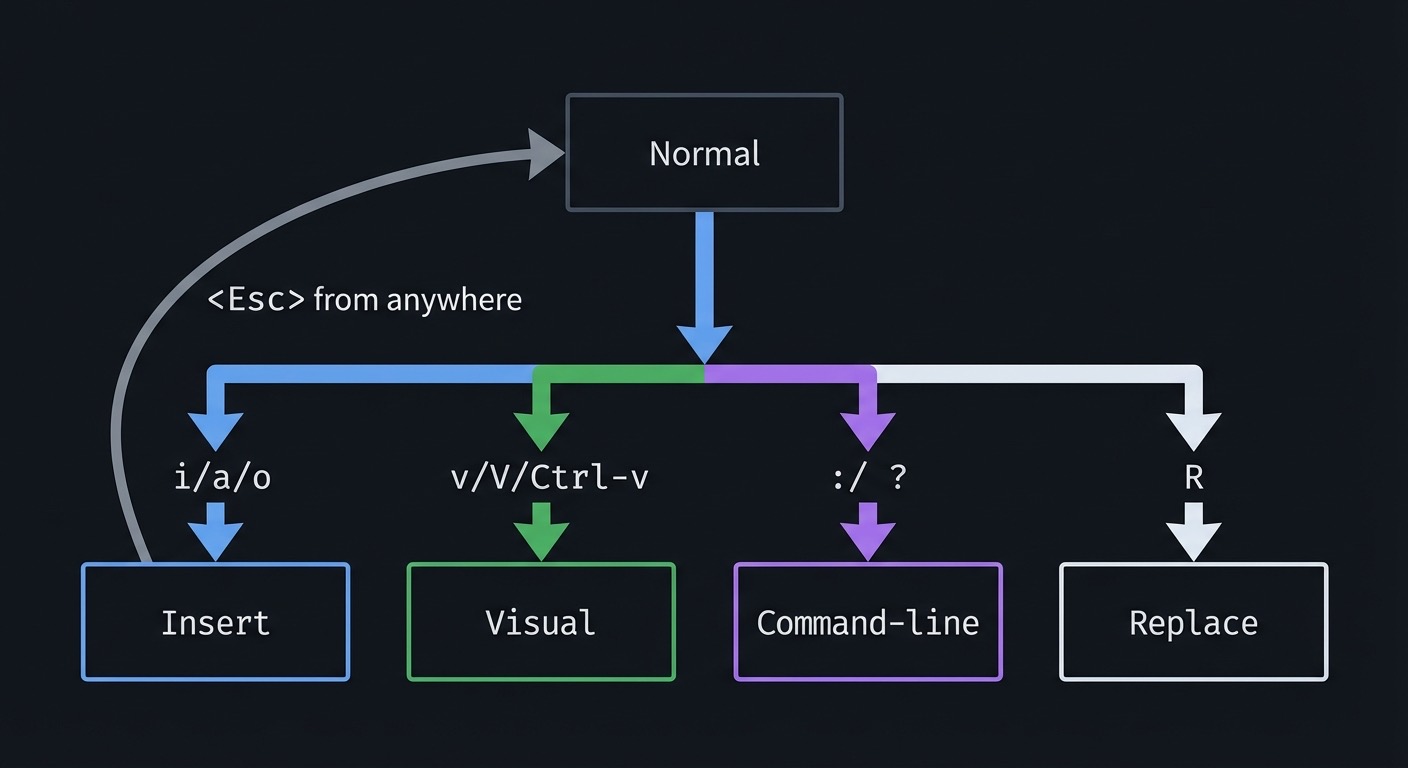
Mental model diagram
Normal
  | i/a/o  -> Insert
  | v/V/Ctrl-v -> Visual
  | : / ? -> Command-line
  | R -> Replace
  | <Esc> from anywhere -> Normal
How it works
- Vim starts in Normal mode.
- You enter a mode to express intent (insert, select, search, command-line).
- You perform a change or navigation.
- You return to Normal mode to plan the next change.
Minimal concrete example
iHello<Esc>
A world<Esc>
vj>
Common misconceptions
- “Insert mode is the main mode.” (Normal is the default.)
- “Visual selection is required to edit.” (Operators usually beat visual.)
- “Esc is a waste of time.” (It is the reset button.)
Check-your-understanding questions
- What mode are you in after
ci"? - Which key returns to Normal from any mode?
- Why is Normal mode the default?
Check-your-understanding answers
- Insert mode (after the change).
<Esc>(orCtrl-[).- Most commands and navigation occur there.
Real-world applications
- Editing over SSH without a mouse
- Refactoring code with repeatable edits
- Navigating large logs in terminal sessions
Where you’ll apply it Projects 1-10.
References
- Vim
:help mode - Vim
:help visual-mode - “Practical Vim” - Ch. 2-4
Key insights Normal mode is where you design edits; other modes are temporary tools.
Summary Modal editing converts editing into a small number of intentional states, making complex changes predictable and repeatable.
Homework/Exercises to practice the concept
- Switch between
i,Esc,a,Esc,o,Escfor 2 minutes. - Use Visual line and block modes to select and indent blocks.
Solutions to the homework/exercises
- Focus on returning to Normal immediately after each insert.
Vselects lines,Ctrl-vselects columns.
Chapter 2: Command Grammar and Operator-Pending Mode
Fundamentals
Vim commands are sentences: [count] operator [count] motion/text-object. Operators are verbs, motions are nouns, and counts are multipliers. The operator-pending state is the brief moment after you type an operator (like d or c) where Vim waits for a motion or text object to complete the command. Understanding this grammar is the single biggest lever for speed because it lets you generate edits on demand instead of memorizing commands. Once the grammar is internalized, your edits become composable: you can combine any operator with any motion and get predictable results.
The grammar also explains why Vim feels consistent. Once you know the operator, you can experiment with different motions and get predictable results. This reduces memorization and makes Vim extensible to new filetypes and text formats.
Deep Dive
The grammar model is a compositional language. You can think of it as a small parser in Vim that reads an operator, then a motion, then applies the operator to the range defined by the motion. Counts can appear before the operator or motion, and Vim multiplies them. This means 2d3w is not two separate ideas but one sentence: delete six words. This also explains why some commands have linewise variants when doubled (dd, cc, yy): Vim treats a doubled operator as a special case meaning “whole line.” Operator-pending mode is a temporary state that makes this possible; when you type an operator, Vim temporarily shifts into a waiting state where your next keystrokes are parsed as a motion or text object. This is how the same motion keys work both for movement and for selection. It also means that any motion can be used as a selection in Visual mode, because motions define text ranges.
The grammar is more than a trick; it changes how you think. Instead of memorizing “delete line” or “change word,” you internalize that d means delete, and then you decide what to delete. This scales to complex edits: d/} deletes up to a brace; caw changes a word and its surrounding space. You can also combine grammar with search to act on dynamic targets. This is why Vim feels powerful for non-uniform text. A GUI editor might require a selection; Vim allows you to describe the selection in words.
Operator-pending mode is also where subtlety lives. Some motions are inclusive or exclusive, and that changes the result. For example, dw behaves slightly differently from de, and cw has special behavior that changes to end-of-word. Understanding these edge cases reduces surprises. You can also use text objects (like iw, a", ip) as nouns in the grammar. Text objects are semantic units independent of cursor location, which makes the grammar more robust. The operator + text object combination is the fastest path for structured edits.
Counts can be used for speed or clarity. If you can see a target three words away, d3w is perfect. But if you cannot guarantee the count, use a motion driven by structure instead (d} or d/). The grammar also encourages designing repeatable edits: you can make a single clean change with c or d, then use . to repeat it elsewhere. This is the point where grammar meets automation.
Finally, operator-pending mode is a diagnostic tool. If you type d and then pause, you are in operator-pending mode. If you then type an invalid motion, Vim will beep or show an error. Learning to recognize this state helps you avoid errors and makes your input confident. It also explains why mappings must be mode-aware: a mapping for Normal mode should not override a motion if you want it to work inside operator-pending mode. A clean grammar depends on predictable motion keys.
Inclusive vs exclusive motions matter for grammar. For example, d$ deletes through end-of-line while d) deletes to the end of a sentence, and the inclusion of the target character changes whether delimiters remain. Operator-pending mode also interacts with mappings: if you remap motion keys in Normal mode only, operator-pending behavior might break. Use operator-pending mappings (omap) when you customize motions so the grammar stays intact.
How this fit on projects Projects 1-6 and 10 rely heavily on composing operators with motions and text objects.
Definitions & key terms
- Operator: the verb (
d,c,y,gU,>,<) - Motion: the noun (
w,},f,,G) - Text object: semantic noun (
iw,a",ip) - Operator-pending: state after typing an operator, waiting for a motion
Mental model diagram
[count] + OPERATOR + [count] + MOTION/TEXT OBJECT
  2     +   d      +   3    +   w    = delete 6 words
How it works
- Choose an operator (verb).
- Choose a motion or text object (noun).
- Apply counts if helpful.
- Vim computes the range and applies the operator.
Minimal concrete example
dw
dd
2d3w
gUap
Common misconceptions
- “Counts only apply once.” (Counts multiply.)
- “Visual selection is faster.” (Operator + motion is often faster.)
- “
dwanddaware identical.” (They select different ranges.)
Check-your-understanding questions
- What does
2d3wdo? - Why does
dddelete a line? - How is
dawdifferent fromdw?
Check-your-understanding answers
- Deletes six words (counts multiply).
- Doubling an operator means linewise operation.
dawincludes the surrounding space and whole word.
Real-world applications
- Deleting or changing code blocks quickly
- Indenting or formatting paragraphs
- Applying transformations at scale with counts
Where you’ll apply it Projects 1-6, 10.
References
- Vim
:help motion.txt - Vim
:help operator - “Practical Vim” - Ch. 8
Key insights If you can name the target, you can edit it.
Summary The operator + motion grammar is the backbone of Vim speed and precision.
Homework/Exercises to practice the concept
- Translate 10 English edits into Vim sentences (e.g., “delete 3 words”).
- Practice
c2w,d3e,yap,gUiwon a sample file.
Solutions to the homework/exercises
- Example: “delete 3 words” ->
d3w. - Use counts and text objects; ensure you are in Normal mode.
Chapter 3: Motions and Text Units
Fundamentals
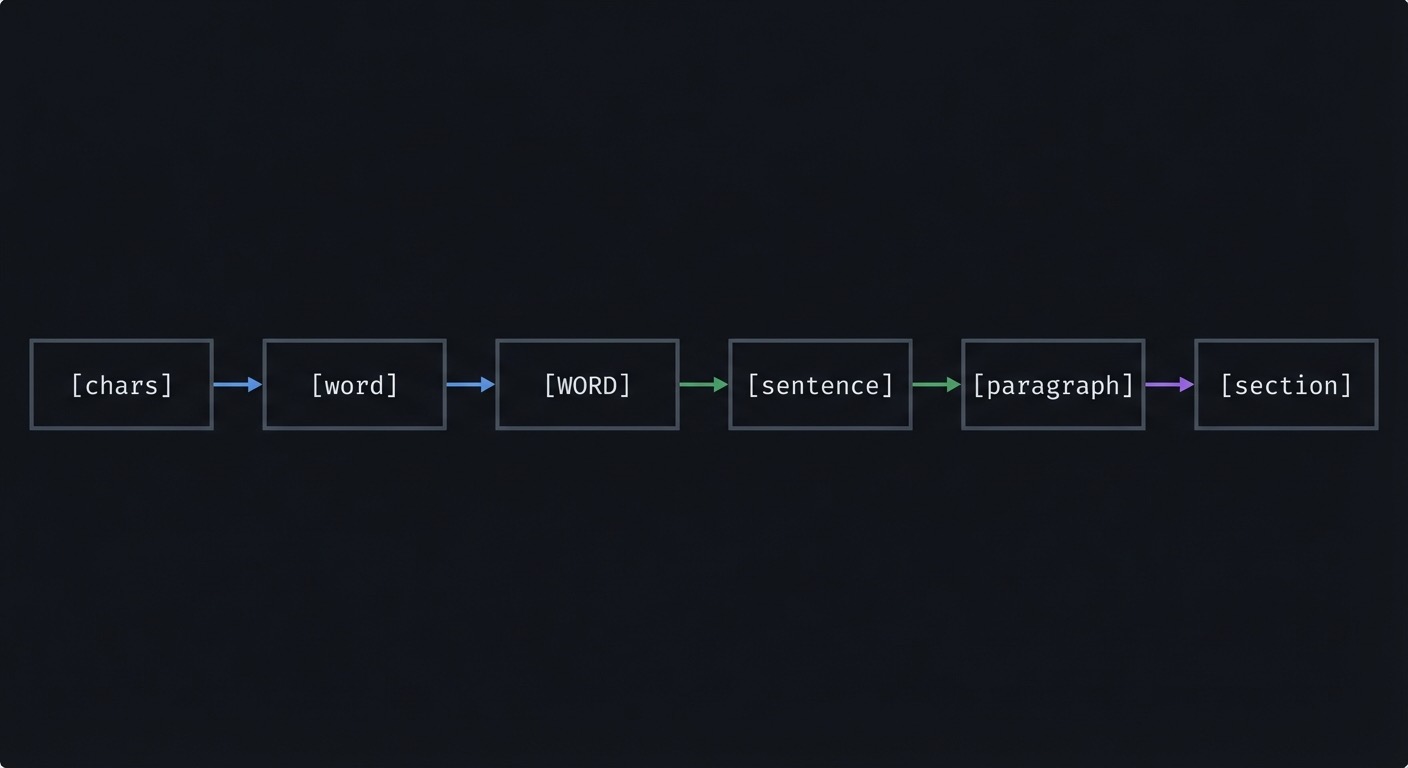
Motions are the nouns of Vim. They define how Vim divides text into units: characters, words, WORDs, sentences, paragraphs, lines, and file boundaries. When you choose a motion, you are describing what kind of unit you care about. This is more powerful than counting characters because it scales across different file types and layouts. Motions are also composable with operators and counts, which means a single motion can drive navigation, deletion, selection, and formatting. Internalizing the difference between word and WORD, sentence and paragraph, line and screen line makes your movement precise.
Motions are also selections: any motion can be used after an operator to define the range. This means learning motions doubles as learning selection, so the same vocabulary controls navigation and editing.
Deep Dive
Motions exist in multiple layers. At the smallest level are character motions (h, l, 0, $) and within-line motions like f, t, ;, and ,. These are surgical tools. Above that are word motions. Vim distinguishes between word (letters, digits, underscore, and configurable characters) and WORD (any non-blank sequence). This distinction matters because code often contains punctuation. For example, foo.bar is two words but one WORD. When you use w and W, you control whether punctuation is a separator or part of the token. This also interacts with the iskeyword option, which can redefine what Vim considers a word. Understanding this helps you tune behavior for different languages.
Next are sentence and paragraph motions () and }) which are not just text formatting concepts; they are semantic chunks. A paragraph is typically separated by a blank line or defined by a macro, which means it often aligns with logical blocks in prose, comments, or documentation. In code, paragraphs can correspond to logical sections or groups of statements. The motion keys for sentences and paragraphs let you move across these blocks without counting lines. Above that are screen-relative motions (H, M, L) and file-level motions (gg, G, %). Screen-relative motions help when the visible context matters more than the absolute line number; they are faster when you see the target but do not want to count lines. File-level motions are essential for jumping to file boundaries and structural markers.
Motions also include searches. /pattern and ?pattern are motion commands that move the cursor to the next or previous match. This is powerful because the search pattern can be as specific as you need, effectively creating a temporary motion for your current problem. You can combine search with operators to turn a search into a deletion or change, e.g., d/ or c?. This reduces the need for visual selection and opens the door to repeatable edits: search once, then repeat with n and .. Understanding that search is a motion is critical; it changes how you structure edits.
Another important layer is text-object-aware motions like % for matching pairs. % understands parentheses, brackets, and braces, which makes it ideal for code. This is a motion that depends on structure, not characters. Combined with operators, it becomes a structural editor. There are also jumps that create entries in the jump list, like searching, using G, or moving between files. These motions are navigation memory, not just movement. When you realize that motions define not just location but history, you will use them more carefully to create return points.
Motions have inclusive and exclusive behavior. For example, dw deletes up to the start of the next word, but de deletes through the end of the current word. This subtlety affects your results when combined with operators. The key is to pick the motion that matches your intent. When in doubt, choose the motion that aligns with your semantic unit rather than your visual estimate. Over time, your brain will pick the right motion automatically, which is where Vim speed appears.
Screen-line motions like gj and gk move by display lines when wrapping is enabled, which is useful in long prose. Similarly, ^ moves to the first non-blank character, which matters when indentation is significant. The more you align motions with structure (indent, punctuation, paragraphs), the less you need to count.
How this fit on projects Projects 1, 3, 4, 6, and 10 rely on word, sentence, paragraph, and search motions.
Definitions & key terms
- word: letters/digits/underscore or defined by
iskeyword - WORD: any non-blank sequence separated by whitespace
- Sentence: ends with
.,!, or?followed by space or end-of-line - Paragraph: separated by blank lines or paragraph macros
- Screen line: line as it appears on screen with wrapping
Mental model diagram
[chars] -> [word] -> [WORD] -> [sentence] -> [paragraph] -> [section]
How it works
- Decide which unit you want to move across.
- Choose the motion for that unit.
- Add a count if you want to scale the move.
- Combine with an operator if you want to act on it.
Minimal concrete example
w/W
b/B
e/E
{ }
gg/G
Common misconceptions
- “WORD is just a bigger word.” (It treats punctuation as part of the WORD.)
- “
walways stops at punctuation.” (Depends oniskeyword.) - “Paragraphs only mean blank lines.” (Macros can define boundaries.)
Check-your-understanding questions
- What is the difference between
wandWonfoo.bar? - Why does
cwbehave likecesometimes? - How do you jump to the start of a file?
Check-your-understanding answers
wstops at punctuation;Wtreatsfoo.baras one WORD.cwis special-cased to change to end of word.gg.
Real-world applications
- Navigating tokens vs full strings in code
- Skipping across sentences in Markdown
- Jumping between sections in long files
Where you’ll apply it Projects 1, 3, 4, 6, 10.
References
- Vim
:help word-motions - Vim
:help sentence - Vim
:help paragraph - “Learning the vi and Vim Editors” - Ch. 3
Key insights Picking the right unit is faster than counting characters.
Summary Motions are semantic. Learn word vs WORD, sentence vs paragraph, and line vs screen.
Homework/Exercises to practice the concept
- In a code file, practice
wvsWon identifiers with punctuation. - Move by paragraphs using
{and}in a Markdown file.
Solutions to the homework/exercises
- Use
wto stop at_or., useWto jump whole tokens. {moves backward,}moves forward.
Chapter 4: Text Objects and Inner/Around
Fundamentals
Text objects are semantic selections that ignore cursor position. The i (inner) and a (around) prefixes let you select the object itself or the object plus surrounding whitespace or delimiters. This is different from motions because text objects are stable inside a structure. If your cursor is anywhere inside a quoted string, i" selects the inside and a" selects the quotes too. Text objects are the most reliable way to edit structured data because they map to meaning rather than location.
Text objects are stable regardless of cursor position, which is why they feel so reliable. If you are inside a block, the object finds the boundaries for you. This makes edits safer in nested structures.
Deep Dive
Text objects turn Vim into a structural editor. The key idea is that they describe what you are inside: a word, a quoted string, a paragraph, a bracket pair, a tag. This removes the need to count or to move to a boundary before editing. When you use an operator with a text object, Vim finds the surrounding object boundaries and applies the operator to that region. This is why ci" works even if the cursor is in the middle of the string. The distinction between inner and around is essential for correctness. i excludes surrounding whitespace or delimiters, while a includes them. For example, daw removes the word and one trailing space, which is perfect for deleting list items without leaving double spaces. diw removes only the word, leaving spacing intact. This difference becomes critical when editing punctuation-separated data like CSV or JSON.
Text objects are not limited to words or quotes. There are objects for parentheses, brackets, braces, tags, and even sentences or paragraphs. You can combine them with any operator. This composability is the engine of fast structural editing. For instance, in HTML you can use cit to change the inner content of a tag, while dat removes the entire tag. In code, ci( changes function arguments, and da{ removes a whole block. The same idea applies to markdown: cip changes an entire paragraph without touching surrounding blank lines.
Text objects are especially powerful because they align with your intent. You do not say “go to the next quote and delete”; you say “change inside this quote.” This reduces cognitive load, because you think in semantics rather than coordinates. The operator + text object grammar also makes changes repeatable, which is crucial for dot command and macros. If you perform a change using a text object, you can often repeat it on the next occurrence without adjustment. This is not always true with raw motions because the motion distance may change.
There are edge cases. For example, if a string contains escaped quotes, the text object may behave unexpectedly depending on filetype settings. If you are inside nested parentheses, Vim chooses the nearest surrounding pair. Learning to predict which pair is “inner” is important. You should also know that some text objects depend on filetype plugins. For example, it and at for HTML tags are provided by matchit or filetype support. In a minimal Vim, some objects may not exist. This is why you should test your environment and understand what is built-in versus filetype-defined.
Text objects also change how you design macros. A macro that uses ci" or di] will adapt to different line lengths and formatting, because it depends on structure. This is why they are more robust than motions like 3w or f,. For long-term mastery, you should default to text objects whenever you are working with structured data or delimited text. They are the highest-leverage Vim concept for editing code and configuration files.
Nested objects introduce edge cases: if you are inside nested parentheses, ci( targets the nearest pair; to reach the outer pair, you must move outward first. Filetype plugins can add objects like it for tags or ic for comments. If an object does not work, check whether filetype detection is enabled and whether the object is defined.
How this fit on projects Projects 2, 3, 6, and 10 use text objects as primary targets.
Definitions & key terms
- Inner object: excludes surrounding whitespace or delimiters (
iw,i") - Around object: includes surrounding whitespace or delimiters (
aw,a") - Delimiter: quote, bracket, brace, or tag boundary
Mental model diagram
[a object] = [whitespace + object + whitespace]
[i object] = [object only]
How it works
- Choose an operator.
- Choose
iora. - Choose the object (word, quote, bracket, paragraph, tag).
- Vim finds boundaries and applies the operator.
Minimal concrete example
ci"
daw
yip
ci(
Common misconceptions
- “Text objects only work in Visual mode.” (They also work after operators.)
- “
iwis the same asw.” (Objects are semantic, motions are positional.) - “You must be on the first character.” (Any position inside works.)
Check-your-understanding questions
- What does
ci(do? - When is
dawbetter thandw? - What is the difference between
a"andi"?
Check-your-understanding answers
- Changes the text inside parentheses.
- When you want the whole word removed including trailing space.
a"includes quotes;i"excludes them.
Real-world applications
- Editing JSON values safely
- Refactoring function arguments
- Wrapping or removing HTML tags
Where you’ll apply it Projects 2, 3, 6, 10.
References
- Vim
:help text-objects - Vim
:help object-select - “Practical Vim” - Ch. 4
Key insights Text objects let you edit structure without counting.
Summary Text objects are the fastest way to edit structured text reliably.
Homework/Exercises to practice the concept
- In JSON, use
ci"to edit values without touching quotes. - In code, use
da(to remove argument lists.
Solutions to the homework/exercises
ci"changes the value, keeping quotes intact.da(deletes arguments and parentheses together.
Chapter 5: Operators and Change Types
Fundamentals
Operators are the verbs of Vim: delete, change, yank, indent, format, case-convert, filter. They determine what happens to a range of text defined by a motion or text object. Understanding operators reduces command memorization because you can express edits in a few primitives. For example, if you know d is delete and ap is a paragraph, then dap is obvious. The operator set is small but powerful, and it becomes more powerful when paired with motions and text objects.
Operators also determine the shape of the change: characterwise, linewise, or blockwise. The motion you choose controls that shape, which affects how text is stored in registers and how it pastes later.
Deep Dive
Operators fall into categories. Destructive operators include delete (d) and change (c), which remove text (and in the case of c, also enter Insert mode). Copying operators include yank (y) and sometimes Y for linewise yank. Formatting operators include indent (> and <), reformat (gq), and filter (!). Case operations (gU, gu, g~) are transformations. Each operator interacts with motions to define a range. For example, gqap means “format a paragraph,” while >i{ means “indent inside braces.” Operators also define what gets placed in registers: delete and change write to registers, yank writes to register 0 and unnamed register, and some operators use specific registers. This is important because operators affect your clipboard history.
Change (c) is one of the most important operators because it includes both deletion and insertion, creating a single change for repeatability. This makes it ideal for dot command repetition. For example, cw changes the rest of a word and leaves you in Insert mode; this is faster and more repeatable than dw followed by i. Understanding this difference changes how you do refactors. Similarly, C is shorthand for c$, and D is shorthand for d$. These linewise shorthands are part of the operator vocabulary.
Indenting and formatting operators are critical in code and prose. Indenting with > and < is linewise by default when used with a count or a linewise motion. Formatting with gq respects textwidth and can be used to wrap comments or paragraphs. Filtering with ! sends a range through an external command. This is extremely powerful but can be dangerous if the command is destructive or unavailable. When using !, you should verify the command on a small range first.
Operators also have edge cases: some are linewise by default, some are characterwise, and some become linewise when doubled. The exact behavior depends on the motion used. If you use a linewise motion (like j with a count or }), you get a linewise operation. If you use a characterwise motion, you get a characterwise operation. This matters for registers and for how the change can be repeated. A good habit is to think about the shape of the operation: characterwise, linewise, or blockwise. Vim supports all three, and you should pick the one that aligns with your intent.
Operators also interact with the . repeat command. A clean operator-based change is usually easy to repeat; a complicated multi-step edit may not be. This is why many Vim users prioritize operator + motion patterns over Visual selection. The operator grammar leads to edits that are shorter and more repeatable. Once you can mentally separate “what to do” from “where to do it,” operators become a compact toolbox rather than a long list of shortcuts.
Beyond the core operators, g~ toggles case, = reindents using filetype rules, and ! filters a range through an external command. These operators are powerful but should be used with clear scope and a preview when possible. Because operator-based changes are a single change, they integrate cleanly with the dot command and undo history. This makes them safer than multi-step edits.
How this fit on projects Projects 2-6 rely on operators for deletion, change, formatting, and indentation.
Definitions & key terms
- Delete (
d): remove text - Change (
c): delete and enter Insert mode - Yank (
y): copy into a register - Indent (
>/<): shift lines - Format (
gq): reflow text - Filter (
!): pipe range through external command
Mental model diagram
Operator chooses action; motion chooses target.
How it works
- Type an operator.
- Provide a motion or text object.
- Vim applies the operator to the computed range.
- The change is stored in registers and can be repeated.
Minimal concrete example
gUiw
>ap
gqip
Common misconceptions
- “Change and delete are unrelated.” (
cisd+ Insert.) - “Indent only works in Visual mode.” (Operators work with motions.)
- “Formatting requires plugins.” (
gqis built in.)
Check-your-understanding questions
- What is the difference between
dandc? - What does
gqapdo? - How do you lowercase inside quotes?
Check-your-understanding answers
ddeletes;cdeletes and enters Insert.- Formats (wraps) a paragraph.
gui".
Real-world applications
- Refactoring identifiers
- Indenting code blocks
- Formatting comments or prose
Where you’ll apply it Projects 2-6.
References
- Vim
:help operator - Vim
:help change.txt - “Practical Vim” - Ch. 1-5
Key insights Operators are verbs; everything else is grammar.
Summary Learn operators and you can express any edit with a motion.
Homework/Exercises to practice the concept
- Uppercase three words with a single command.
- Re-indent a function with one operator.
Solutions to the homework/exercises
gU3wuppercases three words.=apor>apdepending on indent settings.
Chapter 6: Search and Find Motions
Fundamentals
Search is a motion. Find (f, t) is a precision tool on the current line. Together they allow you to jump to targets by pattern rather than by counting. Search motions (/, ?) move the cursor to the next match and can be combined with operators to delete, change, or yank through a match. Find motions (f, t, F, T) move to or just before a character on the current line and can be repeated with ; or ,. Mastering these motions removes the need for repeated j/k and makes edits scalable across large files.
Search is more efficient when you can see the matches. Options like hlsearch and incsearch provide immediate feedback, which reduces mistakes. Find motions are best for visible, single-line targets.
Deep Dive
Search is the most flexible motion because the target can be defined by a pattern rather than a fixed distance. When you type /pattern, Vim searches forward; ?pattern searches backward. This motion becomes a selection when combined with an operator: d/pattern deletes up to the match, c?pattern changes text backward to the match. Unlike raw motions, search adapts to different file structures because the pattern is content-based. The n and N keys repeat the search in the same or opposite direction, creating a fast loop: search, change, repeat. This is essential for repeated edits across a file.
Find motions are line-scoped and quick. f jumps to a character; t jumps before it. This is perfect for editing delimited fields like CSV, function arguments, or log lines. The repeat keys ; and , allow you to move to the next or previous occurrence of the same character without retyping. These motions are also operator-friendly: dt, deletes up to the next comma, leaving the comma intact; df) deletes through the next closing parenthesis. The distinction between f and t matters because inclusive versus exclusive deletion determines whether delimiters remain.
Search patterns are regular expressions in Vim’s flavor. This means you can target complex structures, but it also introduces complexity. For example, you can use \v (very magic) to reduce escaping, or \c for case-insensitive matches. The key is to choose the simplest pattern that uniquely identifies the target. Overly complex patterns are slow and hard to debug. The hlsearch and incsearch options make search more visible and interactive, which improves accuracy and confidence. In projects, you should use these options to see your matches before you act on them.
Search is also a navigation tool for larger structures. You can search for function names, error codes, or log prefixes. Combined with the jump list, search becomes a navigation memory: you can use Ctrl-O to return to previous positions. This means search is not just about reaching the next target, it is also about creating return points. In a workflow, you can search to jump, perform an edit, then jump back. This reduces the cognitive load of “where was I?”
Find motions are best when the target is visible and the line is short. Search is best when the target is repeated or located beyond the current line. Knowing when to use each is part of Vim mastery. A good rule: if the target is on the current line and visible, use f or t. If the target is elsewhere, use / or ?. Both motions are more powerful when combined with operators and the dot command. If your edit is repeatable, the combination of search + change + n + . becomes a fast pipeline for repetitive tasks.
The * and # commands search for the word under the cursor forward and backward, which is faster than typing the pattern. g* and g# do the same but allow partial matches. Search behavior is also controlled by ignorecase and smartcase, which let lowercase patterns be case-insensitive while uppercase patterns stay case-sensitive. These settings make search predictable across code and prose and are worth enabling in a motion-focused setup.
How this fit on projects Projects 1, 3, 5, and 10 rely on search and find to target edits precisely.
Definitions & key terms
- Search (
/,?): forward or backward pattern search - Find (
f,t,F,T): find a character on the current line - Repeat search (
n,N): move to next/previous match - Repeat find (
;,,): move to next/previous find target
Mental model diagram
Search = anywhere in file
Find   = on this line
How it works
- Choose search or find based on scope.
- Execute the motion (
/pattern,f,). - Repeat with
nor;. - Combine with operators for changes.
Minimal concrete example
/Timeout<Enter>
ndt,
f)
Common misconceptions
- “Search is only for navigation.” (It is also a motion for edits.)
- “
tequalsf.” (tstops before the character.) - “You must retype the search.” (
nrepeats it.)
Check-your-understanding questions
- What does
dt)do? - What does
;repeat? - How do you search backward for a word?
Check-your-understanding answers
- Deletes until
)but not including it. - The last
f/tsearch. ?word.
Real-world applications
- Editing CSV fields or log entries
- Jumping between error lines
- Repeating edits across matching patterns
Where you’ll apply it Projects 1, 3, 5, 10.
References
- Vim
:help search - Vim
:help f - “Learning the vi and Vim Editors” - Ch. 3
Key insights Search is a motion, not just a navigation tool.
Summary Search and find are the fastest ways to target text without counting.
Homework/Exercises to practice the concept
- Use
dt,to delete until commas in a CSV line. - Use
/TODOthenn+.to fix multiple TODOs.
Solutions to the homework/exercises
dt,deletes up to the comma./TODO, edit once, thenn.repeatedly.
Chapter 7: Repeatability and the Dot Command
Fundamentals
Vim rewards repeatable edits. The dot command (.) repeats the last change, which can include insertions, deletions, or operator-based edits. If you design a clean, single change, . becomes a multiplier. This means the fastest way to edit is often to design the change once and then repeat it across targets. Repeatability also applies to command-line operations (@: for last Ex command) and macros (@@ for last macro). Understanding repeatability turns Vim from a text editor into a small automation engine.
Counts can multiply repeatability: 5. repeats the last change five times, which is useful in aligned lists. Repeatability is a design choice, not an accident.
Deep Dive
Repeatability is the core of Vim efficiency. The dot command replays the last change, which is more powerful than it appears. A “change” in Vim includes an operator-based edit, an insert sequence, or a combination of both, as long as it starts and ends in Normal mode. This means a clean edit must be designed with dot in mind. For example, if you want to change a word and then repeat that change elsewhere, use cw and type the new word, then return to Normal mode. Now . will replay the change on the next word. If you use multiple disparate commands, the dot command might only repeat part of the change or might not behave as expected. Designing edits with repeatability in mind is a skill.
Repeatability also interacts with search and motions. A common workflow is: search for a pattern (/foo), make a change (cw bar), then use n to find the next match and . to repeat. This creates a tight loop: search, change, repeat. The same principle applies to f and t motions. If your change is associated with a find motion, you can often use ; to move to the next occurrence and . to repeat. This is a powerful pattern for editing repeated fields on a line or across lines.
The dot command only repeats the last change, not the last navigation. This is a feature, not a bug. It means you can control where the change applies by moving to the next target yourself. This division of labor makes repeated edits predictable. It also means you should avoid mixing multiple changes into one sequence if you want to repeat them. If you need a multi-step change, you should consider a macro instead. Macros can capture more complex sequences, but they are heavier than dot. Dot should be your first tool; macros are for when dot is insufficient.
Repeatability is also about data integrity. When you can repeat an edit reliably, you reduce the chance of inconsistent changes. This matters in code refactors, configuration edits, and log transformations. It also supports verification: you can quickly apply changes, then review, then undo or adjust if needed. Dot uses the same undo history as normal changes, so you can undo repeated edits with u and redo with Ctrl-r. This makes repeated changes safe to experiment with.
Finally, repeatability extends beyond the dot command. The @: command repeats the last Ex command, which is useful for substitutions. The & command repeats the last substitution with the same flags. Macros can be repeated with @@, and counts can be used to repeat dot or macros multiple times. Understanding this ecosystem gives you a ladder of automation: dot for simple repetition, @: for command-line repetition, macros for multi-step repetition. The key is to choose the lightest tool that solves the problem.
Another repeatable tool is the substitute repeat &, which replays the last substitution with the same flags. Combined with @: (repeat last Ex command), you get a command-line analog to the dot command. This is helpful when the last change was a command-line operation rather than a Normal mode edit. Understanding these parallel repeat mechanisms helps you choose the fastest repetition path.
How this fit on projects Projects 1-3 and 7 depend on repeatable edits and dot-driven workflows.
Definitions & key terms
- Dot (
.): repeat last change @:: repeat last command-line command@@: repeat last executed macro
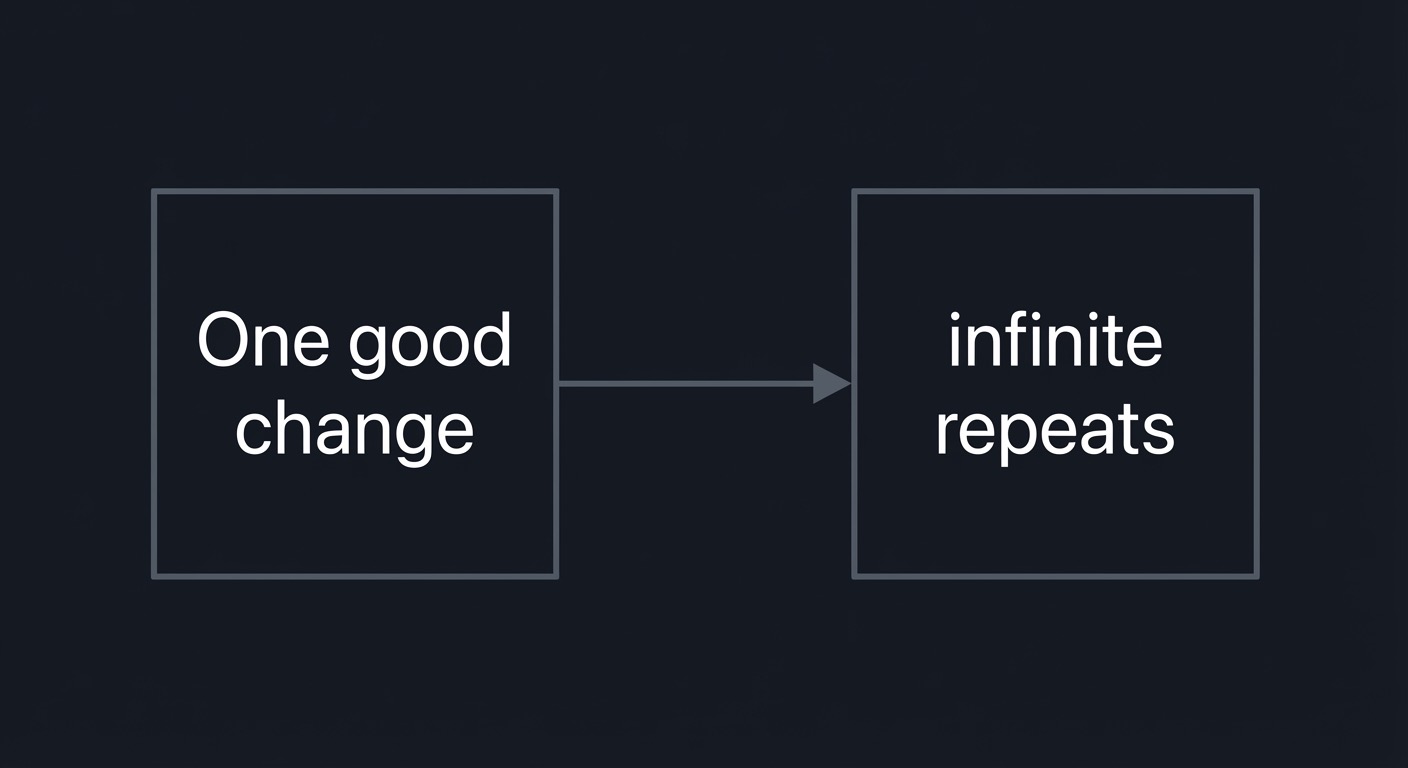
Mental model diagram
One good change -> infinite repeats
How it works
- Perform a clean, single change.
- Move to the next target.
- Press
.to repeat. - Use counts to repeat multiple times if appropriate.
Minimal concrete example
cw bar<Esc>
n .
Common misconceptions
- “Dot repeats navigation too.” (It repeats the change only.)
- “You can dot-repeat command-line.” (Use
@:or&.) - “Any edit works well with
..” (Design edits to be repeatable.)
Check-your-understanding questions
- What does
.repeat? - How do you repeat the last
:scommand? - Why might
xbe a bad change for repetition?
Check-your-understanding answers
- The last change (insert, delete, change, operator).
@:(or&for last substitute).xdeletes one character; a motion-based change is more repeatable.
Real-world applications
- Replacing identifiers across a file
- Reformatting repeated lines
- Applying a change across a search result set
Where you’ll apply it Projects 1-3, 7.
References
- Vim
:help repeat.txt - “Practical Vim” - Ch. 1
Key insights Design edits to be repeatable; dot is free power.
Summary The dot command is the simplest automation tool in Vim.
Homework/Exercises to practice the concept
- Replace “foo” with “bar” in 10 places using
/and.. - Change a list of words to uppercase using one change and dot.
Solutions to the homework/exercises
/foo,cw bar<Esc>, thenn .repeatedly.gUwthenn ..
Chapter 8: Registers and the Text Pipeline
Fundamentals Registers are named storage locations for text. Every yank and delete goes into a register, and you can choose which register to use. This makes Vim a multi-clipboard editor. Understanding registers prevents accidental overwrites and lets you manage multiple snippets at once. Registers include unnamed, numbered, named, small delete, black hole, and system clipboard registers. Knowing where text goes and how to retrieve it is critical for precise editing.
Use :registers to inspect state and avoid surprises. If a delete overwrote your last yank, remember that register 0 still contains the last yank, while numbered registers keep delete history. This keeps edits recoverable.
Deep Dive
Vim’s register system is a pipeline. When you delete or change text, Vim writes the text to the unnamed register and often to a numbered register as well. When you yank, the text goes to register 0 and the unnamed register. This means your last yank and your last delete are stored separately, which is a subtle but powerful feature. If you use the system clipboard, you can yank to "+ or "*, depending on your platform and build. The small delete register ("-) captures small deletions that would otherwise overwrite useful yanks. The black hole register ("_) discards text, which is useful when you want to delete without affecting your clipboard history.
Named registers ("a to "z) allow you to store multiple snippets intentionally. This is essential for complex editing tasks where you need to paste different pieces of text in different places. For example, you can yank a header into register a, a footer into register b, and a middle section into register c, then paste them as needed. Named registers can also be appended to by using uppercase ("A), which is useful for building a list or concatenated content.
Registers also interact with macros, because macros are stored in registers too. This means you can inspect and edit macros as text by pasting the register content. Understanding this makes macros less mysterious and more controllable. The :registers command shows you what is currently stored, which is essential for debugging when you accidentally overwrite a register. In insert mode, you can insert register content with Ctrl-r followed by the register name. This makes it possible to compose text from existing snippets without leaving insert mode.
There are also special registers like "% (current file name), "# (alternate file), ". (last inserted text), and ": (last command-line). These registers are not just for text; they are part of Vim’s automation toolbox. For example, you can insert the current file name into a comment with Ctrl-r % in insert mode, or reuse a previous command-line substitution by pasting the command from ":. These capabilities are often underused but extremely powerful once discovered.
The register system is a source of common confusion. Many users think Vim has a single clipboard. In reality, it has many registers with clear rules. The most important habit is to be explicit when needed. If you are about to delete a large block but want to keep your last yank, use the black hole register: "_d. If you want to keep a snippet safe, store it in a named register. This prevents accidental loss and builds confidence. Registers turn Vim into a text pipeline: delete, store, transform, and paste with precision.
Registers have types: characterwise, linewise, and blockwise. The register type controls how a paste behaves, which is why a linewise yank pastes full lines even when you paste in the middle of a line. The expression register ("=) lets you insert the result of an expression, which can be used for small calculations or evaluated text. This is advanced but shows that registers are more than clipboards.
How this fit on projects Projects 5, 6, and 8 rely on registers for safe, repeatable text transformations.
Definitions & key terms
- Unnamed register (
""): default target for deletes/yanks - Numbered registers (
"0to"9): yank/delete history - Named registers (
"ato"z): user-controlled storage - Black hole (
"_): discard text - System clipboard (
"+,"*): OS clipboard integration
Mental model diagram
operator -> register -> put

How it works
- Delete or yank text (it goes to a register).
- Choose a register explicitly when needed.
- Put text from a register with
porP.
Minimal concrete example
"ayiw
"ap
"_dd
"+y
Common misconceptions
- “Yank is the same as system clipboard.” (Not always.)
- “Deleting text destroys it.” (It goes to registers.)
- “Registers overwrite each other randomly.” (They follow rules.)
Check-your-understanding questions
- Where does
ddgo by default? - How do you yank into register
b? - How do you delete without overwriting the clipboard?
Check-your-understanding answers
- The unnamed and numbered delete registers.
"byyor"byiw.- Use the black hole register:
"_d.
Real-world applications
- Copying multiple snippets between files
- Preventing deletes from overwriting your last yank
- Pasting from different sources in a single edit
Where you’ll apply it Projects 5, 6, 8.
References
- Neovim
:help registers - Vim
:help change.txt - “Practical Vim” - Ch. 10
Key insights You have more than one clipboard; use them intentionally.
Summary Registers are the backbone of safe, multi-clipboard editing in Vim.
Homework/Exercises to practice the concept
- Yank three different words into
a,b,c, then paste them elsewhere. - Delete a paragraph without losing your last yank.
Solutions to the homework/exercises
"ayiw,"byiw,"cyiw, then"ap,"bp,"cp."_dapthen paste withp.
Chapter 9: Marks, Jumps, and Navigation Memory
Fundamentals Marks save positions. Jumps save navigation history. Together they let you teleport and return without losing context. Marks are named locations you set manually, while the jump list records significant movements automatically (searches, file jumps, large moves). This allows you to explore a file or codebase and then return instantly. Understanding marks and jumps reduces the “where was I?” tax and makes large-scale navigation predictable.
Marks persist within a buffer and can be used in Ex ranges. The last visual selection is stored as marks '< and '>, making it easy to apply command-line edits to a selection. This bridges Visual mode and Ex commands.
Deep Dive
Marks are simple but powerful. You set a mark with m{letter} and return to it with `{letter} for exact position or '{letter} for line. Marks are local to a buffer unless you use uppercase letters, which are global across buffers. This means you can set ma inside a file and return later even after moving around. Marks are ideal when you are editing two distant regions and need to bounce between them. The key is to set marks proactively before you move away, especially when you are about to perform a search or a tag jump.
Jumps are automatic. Vim records a jump whenever you move to a different part of the file or a different file using certain commands (search, G, tag jump, etc.). You can traverse the jump list with Ctrl-O (older) and Ctrl-I (newer). This is effectively a browser back/forward for your editing session. The jump list is per window, so splits have independent histories. This means you can navigate in one split without disturbing another, which is useful for multi-file refactors.
The interplay between marks and jumps creates navigation memory. Marks are deliberate anchors; jumps are breadcrumbs. You can set a mark before a complex search sequence, then use Ctrl-O to backtrack through your trail, and finally jump to the mark to return to the anchor. This is especially powerful when exploring unfamiliar codebases. Tag jumps and searches push entries onto the jump list, which means your navigation is inherently reversible if you know how to use it.
Marks also interact with visual selections. The marks '< and '> represent the start and end of the last visual selection. This is useful for applying Ex commands to the last selection, e.g., :'<,'>s/.../.../. This is a subtle but important connection between marks, Visual mode, and command-line operations. It makes Visual selections useful even when you want to operate via Ex commands.
The main failure mode with marks and jumps is forgetting to use them. Many users keep a mental map of their location, which is fragile. A better approach is to externalize location into marks. This reduces cognitive load and allows you to focus on the editing task. The second failure mode is misunderstanding the difference between '{mark} and `{mark}. One jumps to the line, the other to the exact column. If you are editing a specific character or token, use the exact mark. If you only need the line, use the line mark.
Finally, marks and jumps integrate with tags and search. When you jump to a tag definition, Vim records the origin on the tag stack and jump list. This means you can return with Ctrl-t or Ctrl-O. Understanding this makes tag navigation reliable and reduces fear of getting lost in large codebases. Navigation memory is a productivity multiplier; it turns exploration into a reversible process rather than a risk.
There are also automatic marks like for the previous jump location and '. for the last change, which you can use to return to where you last edited. Learning these makes navigation reversible even when you forget to set explicit marks. Combining explicit marks with the jump list creates a reliable navigation strategy for deep dives into large files.
How this fit on projects Projects 6 and 9 rely on marks, jump list, and tag stack navigation.
Definitions & key terms
- Mark: a named cursor position
- Line mark:
'{mark}jumps to the line - Exact mark:
`{mark}jumps to the column - Jump list: history of jump positions per window
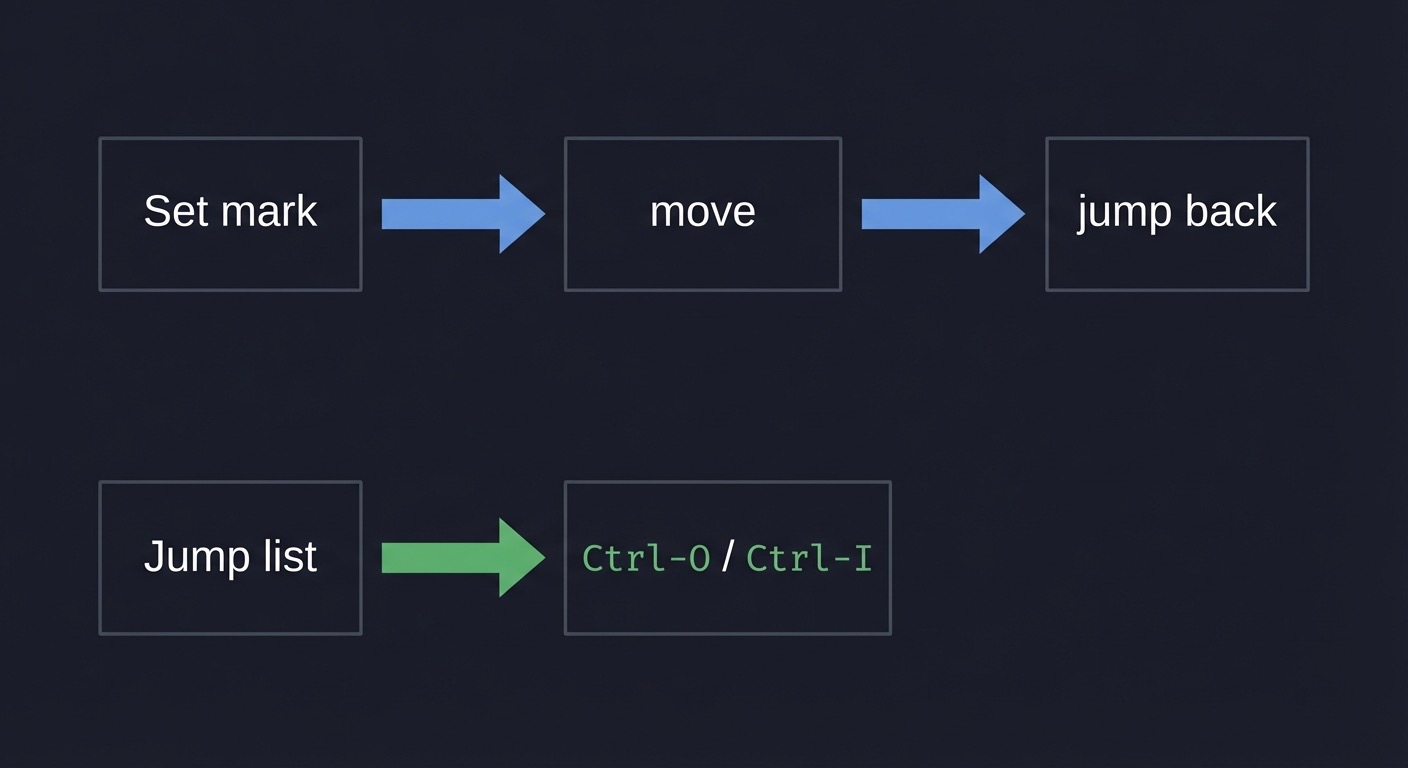
Mental model diagram
Set mark -> move -> jump back
Jump list -> Ctrl-O / Ctrl-I
How it works
- Set a mark (
ma). - Navigate elsewhere.
- Return with
`aor'a. - Use
Ctrl-OandCtrl-Ito traverse jump history.
Minimal concrete example
ma
G
`a
:marks
:jumps
Common misconceptions
- “Marks are like registers.” (Marks store positions, not text.)
- “Jump list is global.” (It is per window.)
- ”
'and ``` do the same.” (Line vs exact position.)
Check-your-understanding questions
- How do you jump to mark
bexactly? - How do you list marks?
- What does
Ctrl-Odo?
Check-your-understanding answers
`b.:marks.- Go to older position in the jump list.
Real-world applications
- Remembering two distant locations in a file
- Navigating call chains in code
- Returning after following tags
Where you’ll apply it Projects 6, 9.
References
- Vim
:help mark - Vim
:help jumplist - “Practical Vim” - Ch. 9
Key insights Navigation history is a first-class tool.
Summary Marks and jumps reduce navigation overhead in large files.
Homework/Exercises to practice the concept
- Set marks at two points and bounce between them.
- Use
/andCtrl-Oto move through jump history.
Solutions to the homework/exercises
ma,mb, then`a/`b./pattern,n,Ctrl-Oto go back.
Chapter 10: Macros and Automation
Fundamentals Macros record keystrokes into registers and replay them. This is programmable editing. A macro is ideal when you need to apply a multi-step change across many similar lines. The key to robust macros is to use motions and text objects rather than fixed counts, which makes the macro resilient to slight variations. Macros are stored in registers, which means they can be edited and reused.
Macros are stored in registers, which means you can reuse them across sessions if you save the register content. They are best for repetitive tasks that dot cannot express in a single change, especially when multiple insertions and motions are required.
Deep Dive
A macro is a recording of your keystrokes in Normal mode. You start recording with q{register}, perform the sequence, and stop with q. You can then replay the macro with @{register}. The macro will do exactly what you did, so its reliability depends on your design. The best macros are structure-aware, using motions and text objects instead of hardcoded character counts. For example, using f, to move to the next comma is more robust than typing 5l because the distance may vary. Likewise, using ci" to change a string is more robust than selecting it visually.
Macros should be designed to fail safely. If a macro depends on finding a pattern, ensure the pattern exists; if it fails, the macro may stop or do the wrong thing. A common technique is to add navigation at the end (like j) so the macro moves to the next line. Another is to start from a consistent position (0 or ^). You can also test a macro on two lines before executing it across hundreds of lines. This reduces error risk.
Because macros are stored in registers, you can inspect them by using "ap to paste the register contents. This lets you debug or edit a macro as text. You can also paste a macro into a file, edit it, then re-yank it into the register. This turns macros into editable scripts. For large transformations, you can chain macros with counts (10@a) or repeat the last macro with @@.
Macros interact with repeatability and the dot command. Dot repeats the last change, but macros repeat a sequence of changes. If you find yourself using dot multiple times but still needing extra steps, a macro may be more appropriate. A good rule: if the sequence is longer than a couple of commands or includes multiple inserts, consider a macro. Another rule: design the macro to be idempotent when possible, so if it runs twice on the same line it either does nothing or does something obvious.
Macros are also powerful for text transformation tasks like converting logs to CSV, reformatting bullet lists, or adding wrappers around lines. Because the macro records actual keystrokes, it works across filetypes and does not require plugins. This is why macros are a core Vim skill. The cost is that macros are opaque until you learn to inspect registers. Once you do, they become a flexible and controllable tool rather than a risky black box.
A robust macro often starts with a motion that establishes a known position, performs a small set of edits, and ends with a movement to the next target line. If a macro fails, undo immediately and inspect the register with :registers or by pasting it to a scratch buffer. You can then edit the macro text, re-yank it into the register, and try again. This turns macros from a one-off recording into a reusable tool. Another technique is to combine macros with counts or with :normal over a range, which scales a macro across selected lines.
How this fit on projects Projects 5 and 7 use macros for automation; Project 10 benefits from macro thinking.
Definitions & key terms
- Record:
q{register}starts recording - Stop:
qends recording - Play:
@{register}executes - Repeat last macro:
@@
Mental model diagram
Record once -> replay many

How it works
- Start recording into a register (
qa). - Perform the edits once.
- Stop recording (
q). - Execute with
@a, optionally with a count.
Minimal concrete example
qa
A; <Esc>j
q
5@a
Common misconceptions
- “Macros are fragile.” (They are if you design them with fixed counts.)
- “Macros cannot be edited.” (They are stored in registers and editable.)
- “Macros are only for experts.” (They save time for everyone.)
Check-your-understanding questions
- How do you record into register
b? - How do you repeat a macro 20 times?
- How do you repeat the last macro without naming it?
Check-your-understanding answers
qb.20@b.@@.
Real-world applications
- Converting logs to CSV
- Editing multiple similar lines
- Refactoring repetitive code patterns
Where you’ll apply it Projects 5, 7, 10.
References
- Neovim
:help usr_10 - Vim
:help repeat.txt - “Practical Vim” - Ch. 11
Key insights Macros turn editing into a lightweight script.
Summary Record, replay, and refine. Macros are repeatable intent.
Homework/Exercises to practice the concept
- Add a semicolon to 10 lines using a macro.
- Convert a list of words to bullets with a macro.
Solutions to the homework/exercises
qa A;<Esc>j qthen10@a.qa I- <Esc>j qthen@arepeatedly.
Chapter 11: Ex Commands, Ranges, and Substitution
Fundamentals
Ex commands are Vim’s command-line language. They operate on ranges of lines and use patterns, which makes them ideal for batch edits. The most common Ex command is substitution (:s), but there are also global commands (:g), move (:m), copy (:t), and delete (:d). Ranges allow you to target specific lines, the whole file (:%), or a visual selection (:'<,'>). Mastering ranges and substitutions gives you the power to transform large files with a single command.
Ex commands are line-oriented by default, which makes them ideal for batch operations. They are composable: you can run a global command that executes another command, effectively creating a pipeline. This is why Ex is often the fastest path for large transformations.
Deep Dive
The command-line mode in Vim is a separate language with its own grammar. You enter it with : for Ex commands, / for forward search, or ? for backward search. Ex commands apply to a range of lines. If no range is specified, the command applies to the current line. A range can be explicit (:1,10), symbolic (:% for whole file), or mark-based (:'<,'> for the last visual selection). Understanding ranges is essential, because it determines the scope of your command. A substitution on the wrong range can cause large unintended changes, so ranges are a safety feature as much as a power feature.
Substitution is the most commonly used Ex command. Its basic form is :s/old/new/, which replaces the first match on the line. Flags like g (global) and c (confirm) change behavior. The confirm flag is particularly important for safety; it allows you to review each match before replacing. Vim’s regex flavor includes special atoms and modes like \v (very magic) to reduce escaping. This allows complex transformations like swapping fields or normalizing log entries. However, complex regex can be brittle, so you should start with the simplest possible pattern and test on a small range before scaling.
Global commands (:g) are another powerful tool. :g/pattern/command runs a command on all lines matching the pattern. This is a second-order operation: you are not just moving to matches, you are performing an action on them. For example, :g/ERROR/d deletes all lines containing ERROR. Combined with :v (inverse global), you can filter files by inclusion or exclusion. These commands are fast and precise but can be dangerous; always test with :g/pattern/p to print the lines first.
Ex commands also interact with Normal mode. You can run Normal mode commands over a range with :normal, which allows you to apply motions and operators to multiple lines. This is useful when a single substitution is not enough. For example, you can use :g/pattern/normal to apply a Normal mode edit to all matching lines. This bridges the gap between linewise commands and structural edits. It also means your Normal mode grammar can scale to batch operations.
The command-line language is best understood as a batch editor. It is not just a fallback; it is a complementary interface. Visual mode can define a range, Ex commands operate on that range, and the results can be repeated with @: or &. This makes command-line operations repeatable in the same way as Normal mode edits. In practice, you should use Ex commands for large, line-oriented transformations, and Normal mode for structural edits within lines. Learning when to switch between them is the difference between a novice and an expert.
A safe workflow is to preview target lines with :g/pattern/p before running a destructive command. The inverse global :v is useful for deleting everything except matches, which is a common cleanup task. Ex commands can also be combined with marks and line numbers to build precise ranges. When you are unsure, use the confirm flag or narrow the range to a few lines, then expand once the pattern is proven.
How this fit on projects Projects 4, 5, and 10 use Ex commands for line operations and substitutions.
Definitions & key terms
- Range: a set of lines (
:1,10,:%,:'<,'>) - Substitute:
:s/old/new/ - Global:
:g/pattern/command - Confirm flag:
cprompts before each replacement
Mental model diagram
Range + Command + Pattern = batch editing
How it works
- Define a range.
- Choose a command (
:s,:g,:m,:t). - Provide a pattern or target.
- Execute and verify.
Minimal concrete example
:%s/foo/bar/gc
:1,10s/\v(\w+), (\w+)/\2 \1/
:g/ERROR/d
Common misconceptions
- ”
:sonly works on one line.” (Use ranges.) - “Regex must be escaped heavily.” (Use
\vvery magic.) - ”
:gis a search.” (:gruns a command on matches.)
Check-your-understanding questions
- What does
%mean in a range? - How do you confirm each substitution?
- What does
:g/pat/normal dddo?
Check-your-understanding answers
- The whole file.
- Add the
cflag. - Deletes lines matching
pat.
Real-world applications
- Transforming CSV, logs, and data dumps
- Cleaning trailing whitespace
- Bulk renaming identifiers
Where you’ll apply it Projects 4, 5, 10.
References
- Vim
:help cmdline.txt - Vim
:help :substitute - Vim
:help :global
Key insights Ex commands are Vim’s batch processor.
Summary Ranges and substitutions unlock fast, safe bulk editing.
Homework/Exercises to practice the concept
- Replace all
TODOwithDONEin a file. - Swap “Last, First” to “First Last” with one command.
Solutions to the homework/exercises
:%s/TODO/DONE/g.:%s/\v([^,]+), (.+)/\2 \1/.
Chapter 12: Tags and Code Navigation
Fundamentals
Tags let you jump from a symbol to its definition using a generated index. A tags file is an index produced by tools like ctags. Vim can use this file to jump to definitions (Ctrl-]) and return (Ctrl-t). This is built into Vim and works in any language supported by the tags generator. Tags are a navigation system that turns code into a graph rather than a set of files.
Tags are language-agnostic because they are generated by external tools. This makes them useful even in environments where language servers are unavailable. A tags file is just text, so it is portable and easy to regenerate.
Deep Dive
Tags are a lightweight alternative to full IDE navigation. A tags generator scans your project and produces a file named tags containing symbol names, file locations, and search patterns. Vim reads this file and uses it to jump to definitions. The Ctrl-] command jumps to the tag under the cursor, and Ctrl-t returns via the tag stack. This is fast because it relies on a prebuilt index rather than live analysis. It also works offline and in minimal environments, which makes it ideal for remote servers or constrained systems.
The tag stack is separate from the jump list, though they often work together. When you jump to a tag, Vim pushes the current location onto the tag stack, so you can return with Ctrl-t. This is similar to a browser history but specific to tag jumps. The jump list is broader and includes other motions. Understanding the difference helps you choose the right return path. If you followed a tag, use Ctrl-t. If you navigated with searches or G, use Ctrl-O.
Tags are only as good as the generator. Universal Ctags is widely used because it supports many languages and custom definitions. The tags file must be kept up to date; otherwise, you will jump to stale locations. In practice, you can regenerate tags when you pull changes or as part of a build step. For large repositories, you may want to generate tags selectively or use filetype-specific options to reduce noise.
Tags are also influenced by your tags option in Vim, which can include multiple tag files and search paths. This allows you to have a project-local tags file and a global tags file for system libraries. This is especially useful in languages like C where system headers are important. You can also use :tag and :tselect to choose among multiple definitions. This is necessary when a symbol is overloaded or appears in multiple files.
The key limitation of tags is that they are static. They do not understand runtime behavior or dynamic language features without additional tooling. However, for navigation and structural understanding, tags are extremely effective. They complement rather than replace LSPs. In many environments, tags are the only available navigation system, which makes them a valuable skill. Understanding tags also builds a mental model of code as a graph of definitions and references, which aligns with how large systems are designed.
When multiple definitions exist for a symbol, Vim provides :tselect to choose the correct one. The tags option can include multiple tag files, which allows a project-specific tags file plus a global tags file for libraries. This helps navigation across dependencies. Tags are not a replacement for semantic analysis, but they are fast and deterministic. If you combine tags with grep and the jump list, you can build an efficient exploration loop without a heavy runtime.
Operationally, tags integrate well with tools like :grep or external search, creating a loop: search for a symbol, jump with tags, then jump back. For polyglot repos, you may need multiple tag generators or language-specific options. Keeping tags in .gitignore avoids noise while still allowing local navigation. These practices keep tag navigation fast and trustworthy.
How this fit on projects
Project 9 focuses on tags and jump stack navigation.
Definitions & key terms
- Tags file: index of symbols generated by ctags
- Tag jump:
Ctrl-]to definition - Tag stack: return with
Ctrl-t - Tag selection: choose among multiple definitions
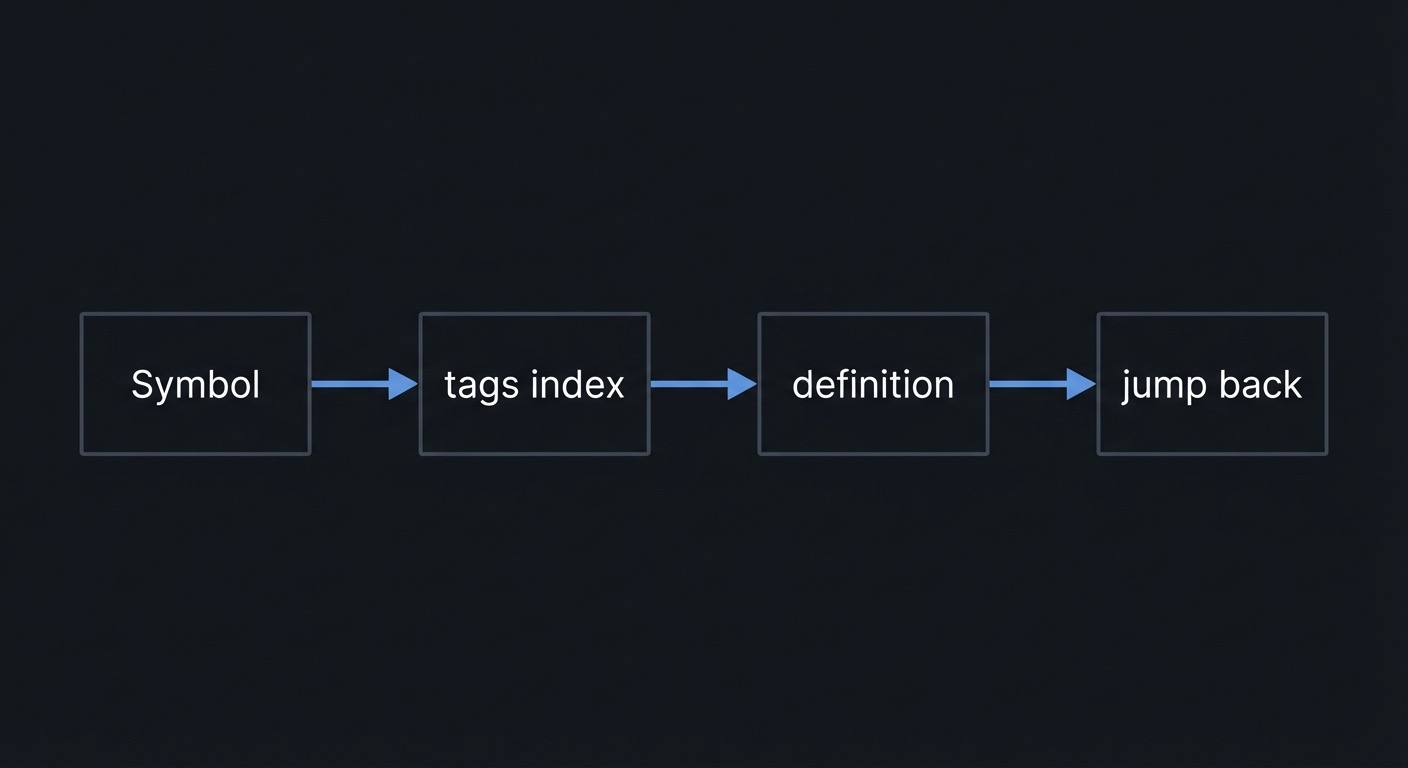
Mental model diagram
Symbol -> tags index -> definition -> jump back
How it works
- Generate tags with ctags.
- Place cursor on a symbol.
- Jump to its definition with
Ctrl-]. - Return with
Ctrl-t.
Minimal concrete example
$ ctags -R .
Ctrl-]
Ctrl-t
:tags
Common misconceptions
- “Tags are a plugin feature.” (They are built-in.)
- “You must use a file explorer.” (Tags are faster.)
- “Tags are always current.” (They must be regenerated.)
Check-your-understanding questions
- What command generates tags?
- How do you jump back after
Ctrl-]? - What does
:tagsshow?
Check-your-understanding answers
ctags -R .Ctrl-t(orCtrl-O).- The tag stack.
Real-world applications
- Exploring unfamiliar codebases
- Navigating C, Go, Python, or JS projects
- Following call chains quickly
Where you’ll apply it Project 9.
References
- Vim
:help tags - Vim
:help tagsrch.txt - Universal Ctags documentation
Key insights Tags turn code into a navigable graph.
Summary Tags remove the need for manual file traversal.
Homework/Exercises to practice the concept
- Generate tags for a small repo and jump to 5 symbols.
- Use
Ctrl-OandCtrl-tto return.
Solutions to the homework/exercises
ctags -R ., thenCtrl-]on symbols.- Use jump and tag stack keys to return.
Chapter 13: Configuration and Mappings
Fundamentals
Your .vimrc is a small configuration file that shapes your workflow. A few options and mappings can remove friction and make motion workflows faster. The goal is not to build a large configuration, but to capture a handful of ergonomic improvements like line numbers, search highlighting, and easier escape from Insert mode. Mappings let you rebind keys or create shortcuts, and the leader key provides a namespace for your own commands. Minimal, intentional configuration is enough for effective Vim motion workflows.
Configuration choices should support the motion grammar rather than fight it. If a mapping makes a core motion harder to reach or changes its behavior, it will slow you down. A minimal, consistent configuration is more valuable than a complex one.
Deep Dive
Configuration in Vim is a trade-off between ergonomics and portability. The minimal configuration approach focuses on options that improve visibility and reduce friction without creating dependencies. Useful options include number and relativenumber for navigation, hlsearch and incsearch for search visibility, ignorecase and smartcase for intuitive search behavior, and expandtab or tabstop for consistent indentation. These options create a predictable environment, which is crucial for motion-based editing.
Mappings are another layer. A mapping is a key remap, such as mapping jj in Insert mode to exit to Normal mode. The key principle is to use non-recursive mappings (noremap) to avoid loops and unpredictability. Mappings should be minimal and should not override default motions that you rely on. Over-mapping can reduce your ability to use Vim’s built-in grammar, which is why a small set of carefully chosen mappings is better than a large keymap.
The leader key is a convention for custom mappings. By setting mapleader to a space or comma, you create a namespace that does not conflict with built-in commands. This makes it easier to remember custom mappings because they all share a prefix. For example, <leader>h could clear search highlighting, while <leader>n could toggle line numbers. The key is to keep these mappings simple and related to your motion workflow.
Configuration also includes filetype detection, which can enable text objects and formatting rules. For example, certain text objects or indent behavior depend on filetype settings. If you disable filetype detection, you may lose helpful behaviors. Conversely, if you rely heavily on filetype-specific features, your configuration becomes less portable. The guiding principle is to keep a minimal baseline that works everywhere and optionally layer on filetype-specific enhancements.
Finally, configuration is part of repeatability. If you work across machines, keeping a small .vimrc that you can copy ensures your motions and commands behave consistently. This is particularly important for training: if the environment changes, your muscle memory will be disrupted. A minimal configuration also makes troubleshooting easier because there are fewer moving parts. When problems occur, you can disable mappings or options to find the source quickly. Configuration is not about being fancy; it is about removing friction so the motion grammar can shine.
Mapping conflicts are a common source of confusion. Use :verbose map to see where a mapping was defined when something behaves unexpectedly. When adding mappings, prefer nnoremap, inoremap, and vnoremap to avoid recursion. Keep a small, version-controlled .vimrc so you can reproduce your environment anywhere. For portability, avoid plugin-dependent commands in the core config and keep filetype-specific tweaks minimal. You can also create a separate local config file for machine-specific settings, which keeps the main config clean. Document your mappings in brief comments to prevent mystery keys from accumulating.
Another practical pattern is to keep a minimal config file you can load with vim -u minimal.vimrc when troubleshooting. This isolates whether a mapping or option is causing a behavior change. Also, consider setting set nocompatible explicitly in legacy Vim to ensure modern defaults. These small practices make your configuration reliable and easier to share.
How this fit on projects
Project 8 is dedicated to building a minimal, motion-focused configuration.
Definitions & key terms
- Option: a configurable setting (
set number) - Mapping: a key remap (
nnoremap) - Leader: a prefix key for custom mappings (
mapleader)
Mental model diagram
Defaults -> small config -> personal workflow
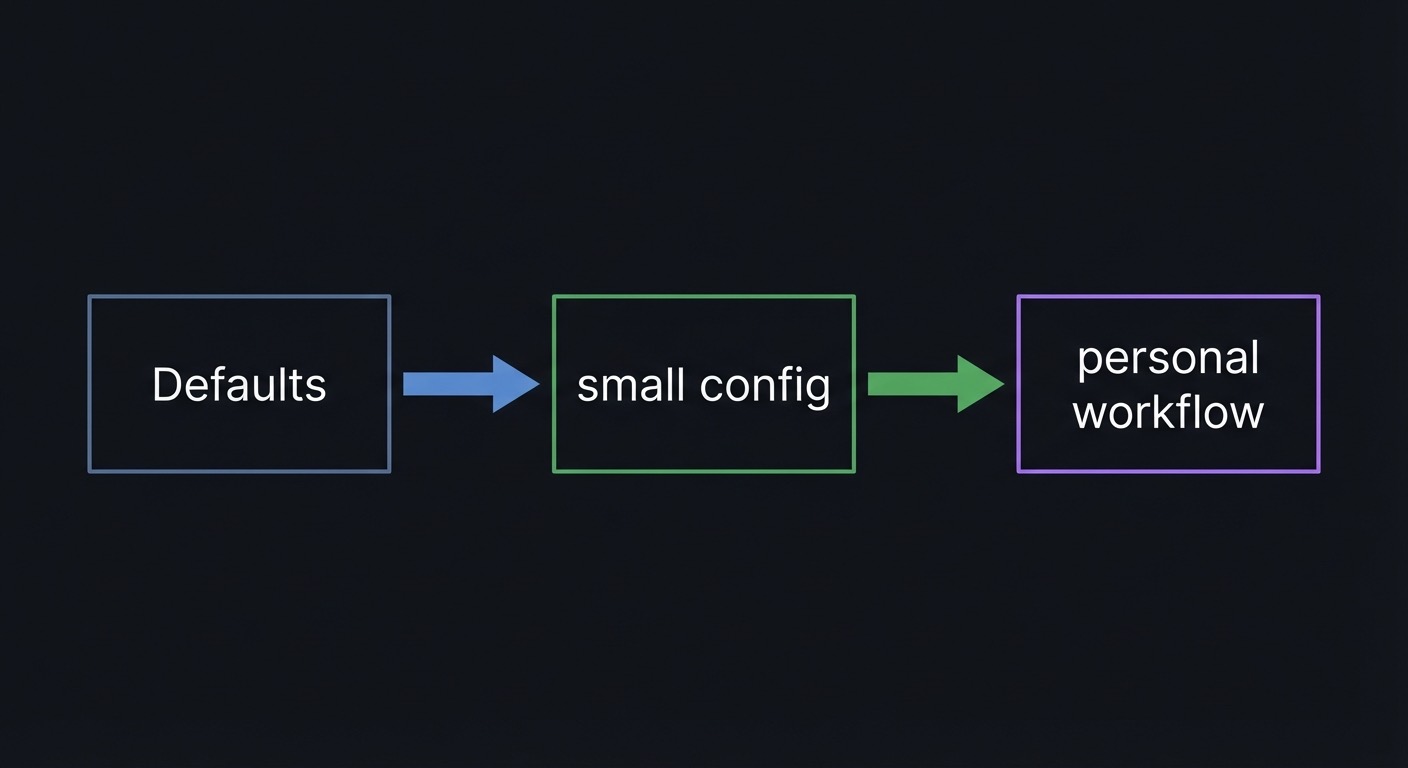
How it works
- Start with defaults.
- Add a few visibility and search options.
- Add minimal mappings for friction points.
- Reload and test.
Minimal concrete example
set number
set relativenumber
set hlsearch
set incsearch
let mapleader = " "
Common misconceptions
- “You need dozens of plugins.” (A small config goes far.)
- “Mappings are always safe.” (Use non-recursive mappings.)
- “Vimrc changes require restart.” (
:source %reloads.)
Check-your-understanding questions
- What does
nnoremapdo? - How do you set the leader key?
- How do you reload
.vimrc?
Check-your-understanding answers
- Non-recursive Normal mode map.
let mapleader = " "(or another key).:source %.
Real-world applications
- Faster escapes from Insert mode
- Quick toggles for search highlighting
- Consistent behavior across machines
Where you’ll apply it Project 8.
References
- Vim user manual
:help usr_05 - Vim
:help map.txt - “Modern Vim” - Tips 26-28
Key insights A small config removes most friction without harming portability.
Summary Configuration is about ergonomics, not complexity.
Homework/Exercises to practice the concept
- Add a mapping to clear search highlighting.
- Set relative numbers and verify navigation feels easier.
Solutions to the homework/exercises
- Map
<leader>hto:nohlsearchin Normal mode. set relativenumberand use5jor3kin a file.
Glossary
- Buffer: in-memory file content
- Window: viewport into a buffer
- Tab: collection of windows
- Motion: cursor movement command
- Operator: command that acts on a motion or text object
- Text object: semantic selection like
iwora" - Register: named storage for text
- Mark: named cursor position
- Jump list: history of significant cursor jumps
- Macro: recorded keystrokes stored in a register
- Range: line range for Ex commands
- Ex command: command-line operation (
:s,:g,:m) - Tag: indexed symbol definition in code
Why Vim Motions Matters
- Modern motivation and real-world use cases: Vim and Neovim remain widely used in professional workflows, especially in terminal-heavy environments and remote servers.
- Real-world statistics and impact: The Stack Overflow Developer Survey 2023 (86,544 responses) reports Visual Studio Code at 73.71% usage among all respondents, with Vim at 22.29% and Neovim at 11.88% in the IDE/editor list. These numbers show that modal editing remains widely used alongside mainstream editors.
- Context & Evolution: Vim evolved from
vi, but the operator + motion grammar has remained stable for decades, making it a portable skill across systems.
OLD APPROACH                       VIM APPROACH
+-------------------+              +------------------------+
| Select text       |              | Describe the target    |
| Delete it         |    vs        | "change inside quotes" |
| Re-type it        |              | ci"                    |
+-------------------+              +------------------------+
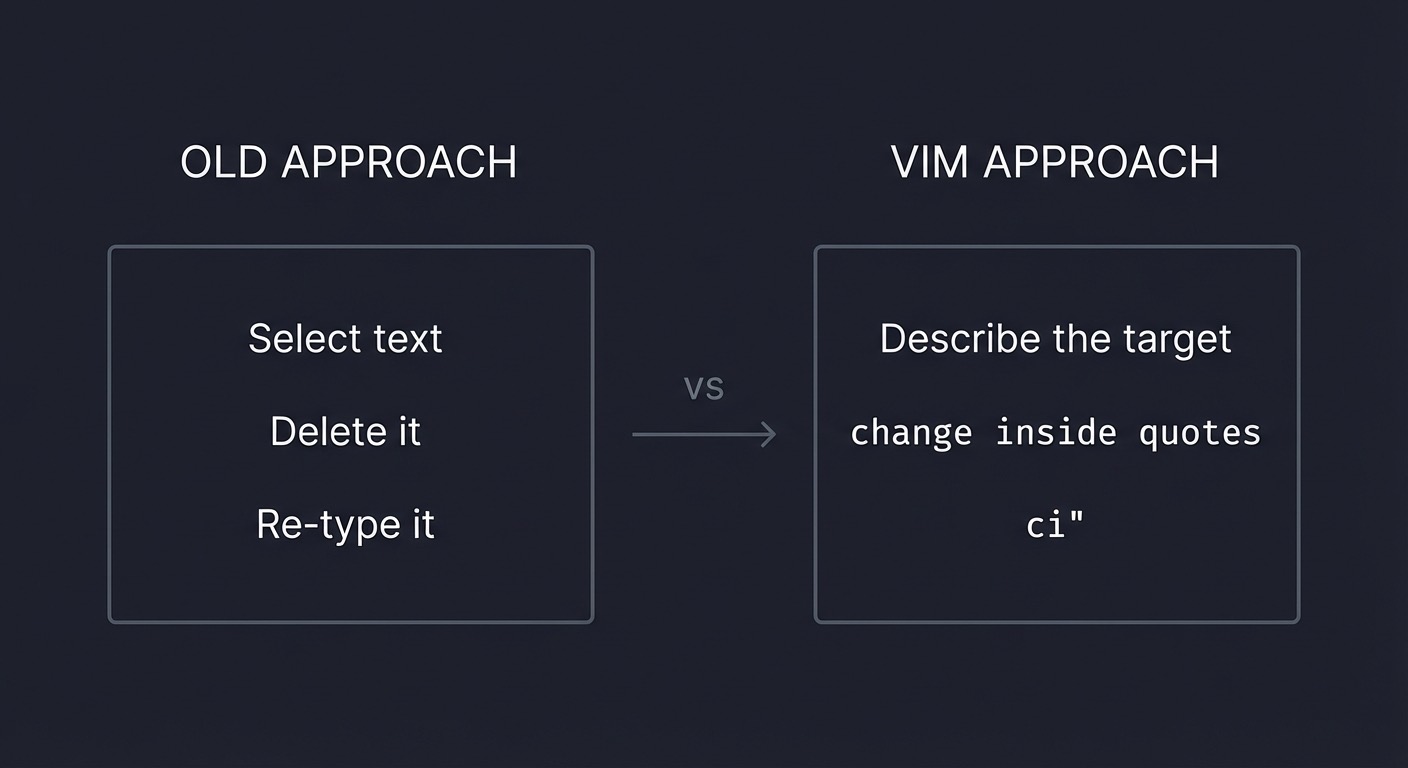
Concept Summary Table
| Concept Cluster | What You Need to Internalize |
|---|---|
| Modal Editing | Vim is a state machine; Normal is the default planning mode. |
| Command Grammar | Operator + motion + counts form a composable language. |
| Motions & Units | Word vs WORD, sentence, paragraph, and file motions. |
| Text Objects | Inner vs around lets you target structure. |
| Operators | Delete/change/yank/indent/format as verbs. |
| Search & Find | Search is a motion; find is line-precision. |
| Repeatability | Dot and repeatable edits are core. |
| Registers | Multiple clipboards with clear rules. |
| Marks & Jumps | Save positions and navigate history. |
| Macros | Record, replay, and automate. |
| Ex Commands | Ranges + regex = batch edits. |
| Tags | Jump to definitions in code. |
| Config | Small vimrc removes friction. |
Project-to-Concept Map
| Project | Concepts Applied |
|---|---|
| Project 1: No-HJKL Navigator | Modal Editing, Motions & Units, Search & Find, Repeatability |
| Project 2: JSON Surgeon | Text Objects, Operators, Search & Find |
| Project 3: Code Refactor | Command Grammar, Operators, Repeatability, Text Objects |
| Project 4: Markdown Re-Sequencer | Ex Commands, Operators, Motions & Units |
| Project 5: Log Parser | Macros, Registers, Search & Find, Ex Commands |
| Project 6: HTML Wrapper | Text Objects, Registers, Marks & Jumps |
| Project 7: Vim Golf | Command Grammar, Repeatability, Macros |
| Project 8: Config Builder | Config |
| Project 9: Code Navigator | Tags, Marks & Jumps |
| Project 10: Search-Replace | Ex Commands, Search & Find |
Deep Dive Reading by Concept
| Concept | Book and Chapter | Why This Matters |
|---|---|---|
| Modal Editing | “Practical Vim” - Ch. 2-4 | Core mental model of modes |
| Command Grammar | “Practical Vim” - Ch. 8 | Operator + motion fluency |
| Motions & Units | “Learning the vi and Vim Editors” - Ch. 3 | Word/line navigation |
| Text Objects | “Practical Vim” - Ch. 4 | Structural editing |
| Operators | “Practical Vim” - Ch. 1-5 | Edit verbs |
| Search & Find | “Practical Vim” - Ch. 13 | Motion-driven search |
| Repeatability | “Practical Vim” - Ch. 1 | Dot command mindset |
| Registers | “Practical Vim” - Ch. 10 | Multi-clipboard control |
| Marks & Jumps | “Practical Vim” - Ch. 9 | Navigation memory |
| Macros | “Practical Vim” - Ch. 11 | Automation |
| Ex Commands | “Practical Vim” - Ch. 14-15 | Substitution & global |
| Tags | “Practical Vim” - Ch. 16 | Code navigation |
| Config | “Modern Vim” - Tips 26-28 | Minimal setup |
Quick Start: Your First 48 Hours
Day 1:
- Read chapters: Modal Editing, Command Grammar, Motions & Units, Text Objects.
- Start Project 1 and complete the navigation drill.
- Practice
ci",daw,f,,/pattern.
Day 2:
- Read chapters: Operators, Search & Find, Repeatability.
- Start Project 2 and complete the JSON transformations.
- Use
.andnto repeat changes across the file.
Recommended Learning Paths
Path 1: The Beginner
- Project 1 -> Project 2 -> Project 4 -> Project 3 -> Project 7
Path 2: The Refactorer
- Project 3 -> Project 2 -> Project 10 -> Project 9
Path 3: The Data Wrangler
- Project 2 -> Project 5 -> Project 10
Path 4: The Completionist
- Project 1 -> Project 2 -> Project 3 -> Project 4 -> Project 5 -> Project 6 -> Project 7 -> Project 8 -> Project 9 -> Project 10
Success Metrics
- Navigate to any visible target in 1-3 commands.
- Edit inside quotes, brackets, and paragraphs without manual selection.
- Perform repeated edits using
.and macros. - Use registers without losing important yanks.
- Execute a complex
:sor:gcommand confidently. - Jump to definitions using tags and return without losing context.
Project Overview Table
| Project | Focus | Difficulty | Time Estimate | Output |
|---|---|---|---|---|
| 1. No-HJKL Navigator | Motions + search | Beginner | 4-8 hours | Navigation drill file |
| 2. JSON Surgeon | Text objects + operators | Intermediate | 10-15 hours | Cleaned JSON payload |
| 3. Code Refactor | Change operator + dot | Intermediate | 10-20 hours | Refactored function set |
| 4. Markdown Re-Sequencer | Line ops + Ex | Beginner | 6-10 hours | Reordered outline |
| 5. Log Parser | Macros + registers | Advanced | 20-30 hours | CSV-transformed logs |
| 6. HTML Wrapper | Text objects + marks | Advanced | 15-25 hours | Structured HTML list |
| 7. Vim Golf | Minimal keystrokes | Expert | 10-20 hours | Shortest-command solutions |
| 8. Config Builder | Vimrc | Beginner | 6-12 hours | Minimal config |
| 9. Code Navigator | Tags + jumps | Intermediate | 10-20 hours | Tag-enabled repo |
| 10. Search-Replace | Ex + regex | Intermediate | 10-20 hours | Batch-edited file |
Project List
The following projects guide you from basic motion fluency to full editing automation.
Project 1: The No-HJKL Navigator
- File: P01-no-hjkl-navigator.md
- Main Programming Language: None (plain text)
- Alternative Programming Languages: N/A
- Coolness Level: Level 1: Foundation
- Business Potential: Level 2: Productivity Multiplier
- Difficulty: Level 1: Beginner
- Knowledge Area: Motions + search
- Software or Tool: Vim 9+ / Neovim
- Main Book: “Practical Vim” by Drew Neil
What you will build: A navigation drill file and a repeatable motion routine.
Why it teaches Vim motions: It forces you to navigate by meaning rather than by repeated keystrokes.
Core challenges you will face:
- Choosing the right motion -> Motions & Units
- Using search vs find -> Search & Find
- Designing repeatable movement -> Repeatability
Real World Outcome
You will be able to open a large file and jump to any visible target in 1-3 commands without touching arrow keys.
For CLI projects - show exact output:
$ vim navigation_practice.txt
Inside Vim (initial view):
|2025-01-15 10:23:45 ERROR: Database connection failed
2025-01-15 10:23:46 INFO: Retrying connection...
2025-01-15 10:23:47 ERROR: Timeout after 30s;
2025-01-15 10:23:48 INFO: Retrying connection...
Jump to “Timeout”:
/Timeout<Enter>
Cursor result:
2025-01-15 10:23:47 ERROR: |imeout after 30s;
Jump to semicolon:
f;
Cursor result:
2025-01-15 10:23:47 ERROR: Timeout after 30s|;
The Core Question You Are Answering
“How do I move my cursor at the speed of my eyes?”
Concepts You Must Understand First
- Word motions (
w,b,e)- What counts as a word vs WORD?
- Book Reference: “Practical Vim” - Ch. 8
- Find and search (
f,/)- When is
fbetter than/? - Book Reference: “Learning the vi and Vim Editors” - Ch. 3
- When is
- Screen-relative motion (
H,M,L)- Why is screen position faster than line numbers?
- Book Reference: “Practical Vim” - Ch. 8
Questions to Guide Your Design
- Precision
- Should I use
f,t, or/for this target? - Can I repeat with
;orn?
- Should I use
- Speed
- Is
50jslower than/pattern? - Can I use
ggorGinstead of counts?
- Is
Thinking Exercise
The Gaze Test
- Pick a visible target.
- Describe the shortest keystrokes to reach it.
- Execute the plan and verify the cursor location.
Questions to answer:
- Which motion was fastest and why?
- What happens if the target appears twice on the line?
The Interview Questions They Will Ask
- “What is the difference between
fandt?” - “How do you move to the middle of the screen?”
- “What does
%do?” - “How do you repeat a search?”
Hints in Layers
Hint 1: Line jumps
Use f or t before / when the target is on the current line.
Hint 2: Screen jumps
H, M, L target the viewport without counting.
Hint 3: Search as motion
d/pattern deletes up to the next match.
Hint 4: Repeat
; repeats f/t, n repeats /.
Books That Will Help
| Topic | Book | Chapter |
|---|---|---|
| Motions | “Practical Vim” | Ch. 8 |
| Navigation | “Learning the vi and Vim Editors” | Ch. 3 |
Common Pitfalls and Debugging
Problem 1: “I keep using arrow keys”
- Why: Motion reflexes are not built yet.
- Fix: Temporarily disable arrow keys with a mapping.
- Quick test: Navigate one full page without arrows.
Problem 2: “I overuse j/k”
- Why: You are not using search/find.
- Fix: Use
/andffor visible targets. - Quick test: Find 5 targets using
/only.
Definition of Done
- Navigate 20 targets with fewer than 3 keystrokes each
- Use
f,t,/,n,;comfortably - Avoid arrow keys completely
Project 2: The JSON Surgeon
- File: P02-json-surgeon.md
- Main Programming Language: JSON
- Alternative Programming Languages: YAML, TOML
- Coolness Level: Level 2: Precision Tooling
- Business Potential: Level 3: Data Cleaner
- Difficulty: Level 2: Intermediate
- Knowledge Area: Text objects + operators
- Software or Tool: Vim 9+ / Neovim
- Main Book: “Practical Vim” by Drew Neil
What you will build: A set of transformations that update a nested JSON payload without breaking structure.
Why it teaches Vim motions: JSON is structured text; text objects let you edit it safely.
Core challenges you will face:
- Targeting values without touching punctuation -> Text Objects
- Deleting nested objects safely -> Operators
- Navigating keys fast -> Search & Find
Real World Outcome
You will transform a JSON payload safely using text objects and operators.
For CLI projects - show exact output:
$ vim payload.json
Before:
{
  "user": {
    "name": "John Doe",
    "role": "guest",
    "tags": ["trial", "low-priority"]
  },
  "active": true
}
Change role to “admin” with ci":
ci"admin<Esc>
Remove the second tag with di]:
di]
After:
{
  "user": {
    "name": "John Doe",
    "role": "admin",
    "tags": ["trial"]
  },
  "active": true
}
The Core Question You Are Answering
“How do I edit structured data without breaking its structure?”
Concepts You Must Understand First
- Text objects (
iw,i",a{,i])- What does
imean vsa? - Book Reference: “Practical Vim” - Ch. 4
- What does
- Change operator (
c)- Why is
cmore repeatable than delete + insert? - Book Reference: “Practical Vim” - Ch. 1
- Why is
- Search and find (
/,f)- How do you jump to a key quickly?
- Book Reference: “Practical Vim” - Ch. 13
Questions to Guide Your Design
- Safety
- Can I change a value without touching quotes?
- Can I delete an object without leaving a dangling comma?
- Speed
- Should I use
ci"orcw? - Can I repeat with
n+.?
- Should I use
Thinking Exercise
Precision Swap
- Given
"status": "pending", find the fastest way to change it to"approved".
Questions to answer:
- Which text object best isolates the value?
- How will you repeat this for multiple keys?
The Interview Questions They Will Ask
- “What is the difference between
ci"andda"?” - “How do you delete a JSON object without Visual mode?”
- “What does
a[select?” - “Why is
ci"safer thancwhere?”
Hints in Layers
Hint 1: Inner vs around
ci" changes content inside quotes and keeps quotes.
Hint 2: Object deletion
da{ deletes an object including braces.
Hint 3: Arrays
ci] changes inside brackets.
Hint 4: Repeatability
Make one change, then use n . on the next key.
Books That Will Help
| Topic | Book | Chapter |
|---|---|---|
| Text Objects | “Practical Vim” | Ch. 4 |
| Search | “Practical Vim” | Ch. 13 |
Common Pitfalls and Debugging
Problem 1: “I broke the JSON”
- Why: Deleted braces or quotes accidentally.
- Fix: Use
i"ori{text objects. - Quick test: Run a JSON validator if available.
Problem 2: “Extra commas”
- Why: Deleted only the element, not the separator.
- Fix: Use
da,ordi]depending on context. - Quick test: Check for
,]or,}.
Definition of Done
- Change 5 values using
ci" - Delete an object with
da{safely - Edit arrays without breaking JSON syntax
Project 3: The Code Refactor
- File: P03-code-refactor.md
- Main Programming Language: Any (Python/JS/C)
- Alternative Programming Languages: All
- Coolness Level: Level 2: Real Code Work
- Business Potential: Level 4: Refactor Accelerator
- Difficulty: Level 2: Intermediate
- Knowledge Area: Change operator + motions
- Software or Tool: Vim 9+ / Neovim
- Main Book: “Practical Vim” by Drew Neil
What you will build: A refactor plan where you rename identifiers, change function calls, and update strings without Visual mode.
Why it teaches Vim motions: c + motion is the core refactor primitive.
Core challenges you will face:
- Renaming identifiers with minimal keystrokes -> Operators
- Refactoring arguments with text objects -> Text Objects
- Keeping changes repeatable -> Repeatability
Real World Outcome
You will refactor a small code sample with precise changes using operators and dot repetition.
For CLI projects - show exact output:
$ vim refactor_sample.txt
Before:
function build_url(host, path, query) {
  return "http://" + host + "/" + path + "?" + query;
}
Goal (describe the outcome):
- Rename
querytoparams - Change
httptohttps - Update string formatting
After (expected shape):
function build_url(host, path, params) {
  return "https://" + host + "/" + path + "?" + params;
}
The Core Question You Are Answering
“How do I refactor code by describing what to change instead of retyping?”
Concepts You Must Understand First
- Change operator (
c)- How does
cdiffer fromd? - Book Reference: “Practical Vim” - Ch. 1
- How does
- Text objects (
ci",ci()- How do you change inside delimiters?
- Book Reference: “Practical Vim” - Ch. 4
- Repeatability (
.)- Why should you design edits to be repeatable?
- Book Reference: “Practical Vim” - Ch. 1
Questions to Guide Your Design
- Can I express this change as
c+ a motion? - Can I make the change repeatable with
.? - Do I need search (
/) or find (f) to target quickly?
Thinking Exercise
You want to change every timeout to deadline. What is the most repeatable change pattern?
Questions to answer:
- Which motion makes the change repeatable?
- How will you step through occurrences?
The Interview Questions They Will Ask
- “What does
ci(do?” - “When would you use
cwvsciw?” - “How do you repeat a change across multiple matches?”
- “Why is
cpreferred for refactors?”
Hints in Layers
Hint 1: Use search + dot
/timeout then cw deadline<Esc> then n ..
Hint 2: Use text objects
ci" for strings, ci( for arguments.
Hint 3: Change to end of line
C is shorthand for c$.
Hint 4: Keep it repeatable Avoid Visual mode for repeatable changes.
Books That Will Help
| Topic | Book | Chapter |
|---|---|---|
| Change operator | “Practical Vim” | Ch. 1 |
| Text objects | “Practical Vim” | Ch. 4 |
Common Pitfalls and Debugging
Problem 1: “I changed the wrong part”
- Why: Motion was too small.
- Fix: Use a text object like
ci"orci(. - Quick test: Undo and reapply using a larger object.
Problem 2: “Dot repeat doesn’t work”
- Why: You used multiple disjoint changes.
- Fix: Make a single clean change.
- Quick test: Press
.immediately after the first change.
Definition of Done
- Rename 3 identifiers using
cw+. - Change inside quotes using
ci" - Refactor one function call without Visual mode
Project 4: The Markdown Re-Sequencer
- File: P04-markdown-resequencer.md
- Main Programming Language: Markdown
- Alternative Programming Languages: Plain text
- Coolness Level: Level 1: Workflow Builder
- Business Potential: Level 2: Docs Speedup
- Difficulty: Level 1: Beginner
- Knowledge Area: Linewise operators + Ex commands
- Software or Tool: Vim 9+ / Neovim
- Main Book: “Learning the vi and Vim Editors”
What you will build: A reordered, reformatted Markdown outline without copy/paste.
Why it teaches Vim motions: Linewise operators and :m / :t are core structural edits.
Core challenges you will face:
- Moving blocks without breaking structure -> Ex Commands
- Reformatting paragraphs with
gq-> Operators - Using linewise motions -> Motions & Units
Real World Outcome
You will reorder a Markdown outline and reflow a paragraph with command-line edits.
For CLI projects - show exact output:
$ vim release_notes.md
Before:
# Release Notes

- Added feature B
- Added feature A
- Fixed issue C

Conclusion paragraph that is too long and should be wrapped into
multiple shorter lines for readability in Markdown.
After:
# Release Notes

- Added feature A
- Added feature B
- Fixed issue C

Conclusion paragraph that is too long and should be wrapped into multiple
shorter lines for readability in Markdown.
The Core Question You Are Answering
“How do I restructure text without copy/paste?”
Concepts You Must Understand First
- Linewise operators (
dd,yy,p)- How does linewise yank/paste work?
- Book Reference: “Learning the vi and Vim Editors” - Ch. 2
- Ex move/copy (
:m,:t)- How do you move lines without Visual mode?
- Book Reference: “Practical Vim” - Ch. 5
- Formatting (
gq)- What does
gqapdo? - Book Reference: “Practical Vim” - Ch. 5
- What does
Questions to Guide Your Design
- Should I use
dd/por:mfor this move? - Is Visual block needed or is linewise enough?
- Can I reformat using
gqinstead of manual wrapping?
Thinking Exercise
Given a list out of order, how do you move the third item to the top in one command?
Questions to answer:
- Which command preserves numbering?
- Which command is easier to repeat?
The Interview Questions They Will Ask
- “What does
:mdo?” - “How do you reflow a paragraph?”
- “What is the difference between
pandP?” - “What does
gqapmean?”
Hints in Layers
Hint 1: Line move
:m moves the current line to a target line number.
Hint 2: Duplicate
:t copies a line to a target.
Hint 3: Format
gqap formats the paragraph under the cursor.
Hint 4: Repeat
. repeats indent and formatting changes.
Books That Will Help
| Topic | Book | Chapter |
|---|---|---|
| Line operations | “Learning the vi and Vim Editors” | Ch. 2 |
| Command-line mode | “Practical Vim” | Ch. 5 |
Common Pitfalls and Debugging
Problem 1: “I moved the wrong line”
- Why: Miscounted line numbers.
- Fix: Use relative numbers (
set relativenumber). - Quick test:
:set rnuthen retry.
Problem 2: “Paragraph didn’t reflow”
- Why: Cursor not inside paragraph.
- Fix: Use
gqapto target a paragraph object. - Quick test: Place cursor in paragraph and repeat.
Definition of Done
- Reorder a list using
:mordd/p - Format a paragraph with
gqap - Use
.to repeat a line operation
Project 5: The Log Parser
- File: P05-log-parser.md
- Main Programming Language: Plain text (logs)
- Alternative Programming Languages: CSV
- Coolness Level: Level 3: Automation
- Business Potential: Level 4: Ops Accelerator
- Difficulty: Level 3: Advanced
- Knowledge Area: Macros + registers + search
- Software or Tool: Vim 9+ / Neovim
- Main Book: “Practical Vim” by Drew Neil
What you will build: A macro that converts log lines into CSV rows.
Why it teaches Vim motions: It forces you to design repeatable edits with motions and registers.
Core challenges you will face:
- Recording robust macros -> Macros
- Using search/find inside macros -> Search & Find
- Managing registers safely -> Registers
Real World Outcome
You will transform raw logs into a CSV-like output using a macro.
For CLI projects - show exact output:
$ vim logs.txt
Before:
2025-01-15T10:23:45Z INFO user=42 action=login ip=192.168.1.10
2025-01-15T10:24:02Z ERROR user=13 action=logout ip=10.0.0.8
After:
2025-01-15T10:23:45Z,INFO,42,login,192.168.1.10
2025-01-15T10:24:02Z,ERROR,13,logout,10.0.0.8
The Core Question You Are Answering
“How do I automate repetitive edits across many lines?”
Concepts You Must Understand First
- Macro recording (
q,@)- How do you record and replay?
- Book Reference: “Practical Vim” - Ch. 11
- Find + delete (
f,dt)- How do you delete fields quickly?
- Book Reference: “Practical Vim” - Ch. 8
- Registers
- How do you avoid clobbering text?
- Book Reference: “Practical Vim” - Ch. 10
Questions to Guide Your Design
- Can my macro survive slight differences in lines?
- Should I use search (
/) or find (f) inside the macro? - How do I stop the macro cleanly at EOF?
Thinking Exercise
Design a macro that inserts a comma after the second word on each line.
Questions to answer:
- Which motion guarantees the second word boundary?
- How do you move to the next line safely?
The Interview Questions They Will Ask
- “How do you record a macro in register
a?” - “How do you repeat the last macro?”
- “How do you make a macro safer?”
- “How do you stop a macro when a pattern is missing?”
Hints in Layers
Hint 1: Start at line start
Use 0 or ^ inside the macro.
Hint 2: Use f to target separators
f<space> to jump between fields.
Hint 3: End with movement
j at the end of the macro moves to the next line.
Hint 4: Use counts
100@a executes the macro many times.
Books That Will Help
| Topic | Book | Chapter |
|---|---|---|
| Macros | “Practical Vim” | Ch. 11 |
| Registers | “Practical Vim” | Ch. 10 |
Common Pitfalls and Debugging
Problem 1: “Macro stops early”
- Why: A search miss or error breaks it.
- Fix: Test on 2 lines first and add safe motions.
- Quick test: Run
@amanually per line.
Problem 2: “Macro edits the wrong line”
- Why: Missing
jor wrong motion. - Fix: End macro with
jand0. - Quick test: Play the macro on 2 lines and watch the cursor.
Definition of Done
- Convert 50 log lines to CSV with one macro
- Macro uses motions, not fixed counts
- Macro is repeatable without errors
Project 6: The HTML Wrapper
- File: P06-html-wrapper.md
- Main Programming Language: HTML
- Alternative Programming Languages: XML
- Coolness Level: Level 3: Precision Editing
- Business Potential: Level 3: Front-End Editor
- Difficulty: Level 3: Advanced
- Knowledge Area: Text objects + marks + registers
- Software or Tool: Vim 9+ / Neovim
- Main Book: “Practical Vim” by Drew Neil
What you will build: Wrap a plain list in HTML tags without plugins.
Why it teaches Vim motions: It uses text objects, registers, and marks to simulate surround behavior.
Core challenges you will face:
- Inserting paired tags quickly -> Operators
- Reusing text from registers -> Registers
- Jumping between positions -> Marks & Jumps
Real World Outcome
You will wrap each line with tags and add a parent list container.
For CLI projects - show exact output:
$ vim list.txt
Before:
Apples
Oranges
Bananas
Grapes
After:
<ul>
<li>Apples</li>
<li>Oranges</li>
<li>Bananas</li>
<li>Grapes</li>
</ul>
The Core Question You Are Answering
“How do I wrap text in structure without plugins?”
Concepts You Must Understand First
- Insert/append (
I,A)- How do you insert at line start/end?
- Book Reference: “Practical Vim” - Ch. 3
- Registers and
Ctrl-r- How do you paste a register inside Insert mode?
- Book Reference: “Practical Vim” - Ch. 10
- Marks (
m,',`)- How do you return to a saved location?
- Book Reference: “Learning the vi and Vim Editors” - Ch. 3
Questions to Guide Your Design
- Can I reuse a tag by storing it in a register?
- Where should I set marks to jump between list boundaries?
- Can I avoid Visual mode entirely?
Thinking Exercise
You need to wrap each line with <p> and </p>. What is the fastest repeatable sequence?
Questions to answer:
- Which register should store the closing tag?
- Where should the mark be placed?
The Interview Questions They Will Ask
- “How do you paste from register
ain insert mode?” - “What is the difference between
'aand`a?” - “How do you insert at end of line without moving first?”
- “How can you repeat the wrap on the next line?”
Hints in Layers
Hint 1: Use I and A
I<li> then A</li>.
Hint 2: Register paste
In Insert mode: Ctrl-r then register name.
Hint 3: Marks
ma and `a let you return instantly.
Hint 4: Repeatability
Once one line is done, use j . to repeat.
Books That Will Help
| Topic | Book | Chapter |
|---|---|---|
| Insert mode | “Practical Vim” | Ch. 3 |
| Registers | “Practical Vim” | Ch. 10 |
| Marks | “Learning the vi and Vim Editors” | Ch. 3 |
Common Pitfalls and Debugging
Problem 1: “Tags are misaligned”
- Why: Missing
Escbetween insert steps. - Fix: Return to Normal mode before each step.
- Quick test: Toggle
:set showmodeto confirm mode.
Problem 2: “Wrong text pasted”
- Why: Register overwritten by delete.
- Fix: Use a named register (e.g.,
"a). - Quick test:
:registersto inspect contents.
Definition of Done
- Wrap every line with
<li>tags without plugins - Add
<ul>boundaries usingOando - Use a register and a mark at least once
Project 7: The Vim Golf Challenge
- File: P07-vim-golf-challenge.md
- Main Programming Language: None (text editing)
- Alternative Programming Languages: Any
- Coolness Level: Level 4: Expert Efficiency
- Business Potential: Level 2: Speed Cult
- Difficulty: Level 4: Expert
- Knowledge Area: Optimization and repeatability
- Software or Tool: Vim 9+ / Neovim
- Main Book: “Practical Vim” by Drew Neil
What you will build: A set of ultra-short solutions to text-editing problems.
Why it teaches Vim motions: It forces you to think in minimal, composable grammar.
Core challenges you will face:
- Minimizing keystrokes -> Command Grammar
- Designing repeatable edits -> Repeatability
- Choosing the right tool -> Macros vs dot
Real World Outcome
You will produce multiple editing solutions and compare their keystroke counts.
For CLI projects - show exact output:
$ vim golf_targets.txt
Example task:
alpha beta gamma delta
Goal: Change beta to BETA with the fewest keystrokes.
Result (one example):
alpha BETA gamma delta
The Core Question You Are Answering
“How do I minimize keystrokes without sacrificing correctness?”
Concepts You Must Understand First
- Operator + motion grammar
- Can I express the change in fewer parts?
- Book Reference: “Practical Vim” - Ch. 1
- Repeatability (
.)- Is the shortest sequence repeatable?
- Book Reference: “Practical Vim” - Ch. 1
- Macros
- When should I use a macro instead of dot?
- Book Reference: “Practical Vim” - Ch. 11
Questions to Guide Your Design
- Is there a motion that targets the exact unit?
- Can I avoid Visual mode entirely?
- Is a macro more efficient than repeated dot usage?
Thinking Exercise
Given a list of 10 lines, each needing the same change, compare dot vs macro workflows.
Questions to answer:
- Which approach is more robust?
- Which approach is faster for 10 lines?
The Interview Questions They Will Ask
- “Why is operator + motion more repeatable than Visual mode?”
- “What does
.repeat?” - “When would you choose a macro?”
- “How do counts interact with operators?”
Hints in Layers
Hint 1: Count the keystrokes Write down each key in your sequence.
Hint 2: Prefer structure Use text objects to reduce motion.
Hint 3: Make it repeatable
If . repeats it, it is likely the best.
Hint 4: Macro only if needed Macros are heavier; use them for multi-step edits.
Books That Will Help
| Topic | Book | Chapter |
|---|---|---|
| Efficiency | “Practical Vim” | Ch. 1 |
| Macros | “Practical Vim” | Ch. 11 |
Common Pitfalls and Debugging
Problem 1: “Shortest sequence breaks on another line”
- Why: It relied on fixed character counts.
- Fix: Use motions or text objects.
- Quick test: Run on three different lines.
Problem 2: “Macro is faster but brittle”
- Why: Macro did not handle variation.
- Fix: Use search or text objects inside macro.
- Quick test: Test on lines with slight differences.
Definition of Done
- Solve 5 tasks with fewer than 10 keystrokes each
- Provide two solutions and explain trade-offs
- Use dot or macro at least once
Project 8: The Config Builder
- File: P08-config-builder.md
- Main Programming Language: Vimscript (config)
- Alternative Programming Languages: N/A
- Coolness Level: Level 1: Workflow Builder
- Business Potential: Level 2: Personal Productivity
- Difficulty: Level 1: Beginner
- Knowledge Area: Vimrc + mappings
- Software or Tool: Vim 9+ / Neovim
- Main Book: “Modern Vim”
What you will build: A minimal .vimrc optimized for motions and search.
Why it teaches Vim motions: A small config removes friction and supports the editing grammar.
Core challenges you will face:
- Choosing minimal options -> Config
- Adding safe mappings -> Config
- Keeping it portable -> Config
Real World Outcome
You will create a minimal configuration that improves motion visibility and search feedback.
For CLI projects - show exact output:
$ vim ~/.vimrc
Expected config traits:
- Line numbers are visible
- Search highlights are visible and easy to clear
- Relative numbers make counts easy
The Core Question You Are Answering
“How do I remove friction from motion workflows without over-configuring?”
Concepts You Must Understand First
- Vim options
- Which options improve motion visibility?
- Book Reference: “Modern Vim” - Tips 26-28
- Mappings
- Why use non-recursive maps?
- Book Reference: “Practical Vim” - Ch. 13
- Leader key
- How does
mapleadercreate a namespace? - Book Reference: “Modern Vim” - Tips 26-28
- How does
Questions to Guide Your Design
- Which options make navigation easier?
- Which mappings reduce friction without overriding core motions?
- Can this config work on any machine?
Thinking Exercise
Design a mapping scheme with a single leader key that clears search highlight and toggles line numbers.
Questions to answer:
- What should the leader key be?
- Which mappings are safe in Normal mode?
The Interview Questions They Will Ask
- “What does
mapleaderdo?” - “Why use
noremap?” - “How do you reload
.vimrc?” - “What options improve search?”
Hints in Layers
Hint 1: Focus on visibility
number, relativenumber, hlsearch, incsearch.
Hint 2: Keep mappings minimal Map only friction points like clearing highlights.
Hint 3: Use leader Assign a leader key and use it consistently.
Hint 4: Test portability Load config on another machine or in a clean Vim session.
Books That Will Help
| Topic | Book | Chapter |
|---|---|---|
| Config | “Modern Vim” | Tips 26-28 |
| Mappings | “Practical Vim” | Ch. 13 |
Common Pitfalls and Debugging
Problem 1: “Mappings break default motions”
- Why: Overwrote built-in commands.
- Fix: Use leader mappings only.
- Quick test: Verify
w,b,e,fstill work.
Problem 2: “Settings don’t apply”
- Why: File not sourced.
- Fix: Run
:source %. - Quick test: Toggle
:set number?.
Definition of Done
- Minimal
.vimrcwith 5-8 options - At least 2 safe leader mappings
- Config loads without errors
Project 9: The Code Navigator
- File: P09-code-navigator.md
- Main Programming Language: Any codebase
- Alternative Programming Languages: N/A
- Coolness Level: Level 3: Code Explorer
- Business Potential: Level 3: Productivity
- Difficulty: Level 2: Intermediate
- Knowledge Area: Tags + jumps
- Software or Tool: Vim + Universal Ctags
- Main Book: “Practical Vim” by Drew Neil
What you will build: A tag-enabled project that lets you jump to definitions instantly.
Why it teaches Vim motions: Tags and jumps turn code into a navigable graph.
Core challenges you will face:
- Generating tags correctly -> Tags
- Using tag stack and jump list -> Marks & Jumps
- Keeping tags updated -> Tags
Real World Outcome
You will navigate a codebase with tag jumps and return without losing context.
For CLI projects - show exact output:
$ ctags -R .
$ vim src/main.c
Inside Vim:
Place cursor on symbol -> Ctrl-]
Return -> Ctrl-t
The Core Question You Are Answering
“How do I navigate code like a graph instead of a tree?”
Concepts You Must Understand First
- Tags file
- What does
ctagsgenerate? - Book Reference: “Practical Vim” - Ch. 16
- What does
- Tag stack
- How do you return after a tag jump?
- Book Reference: “Practical Vim” - Ch. 16
- Jump list
- How do you return after search or large moves?
- Book Reference: “Practical Vim” - Ch. 9
Questions to Guide Your Design
- Where should the tags file live in the repo?
- How will you regenerate tags after changes?
- When should you use
Ctrl-tvsCtrl-O?
Thinking Exercise
Navigate from a function call to its definition and back, then list your tag stack.
Questions to answer:
- What entries appear in
:tags? - How does the jump list differ?
The Interview Questions They Will Ask
- “What does
Ctrl-]do?” - “How do you return from a tag jump?”
- “What is the difference between tag stack and jump list?”
- “Why do tags get stale?”
Hints in Layers
Hint 1: Generate tags
Run ctags -R . at the repo root.
Hint 2: Use tag stack
Ctrl-] to jump, Ctrl-t to return.
Hint 3: Inspect
Use :tags and :jumps to see navigation history.
Hint 4: Automate updates Consider a simple script or git hook to rebuild tags.
Books That Will Help
| Topic | Book | Chapter |
|---|---|---|
| Tags | “Practical Vim” | Ch. 16 |
| Navigation | “Practical Vim” | Ch. 9 |
Common Pitfalls and Debugging
Problem 1: “Tag jump goes to wrong file”
- Why: Stale or duplicate tag entries.
- Fix: Regenerate tags and use
:tselect. - Quick test: Delete
tagsand regenerate.
Problem 2: “No tags found”
- Why: Tags file not in
tagspath. - Fix: Place
tagsin project root or update:set tags?. - Quick test:
:set tags?and verify paths.
Definition of Done
- Generate tags for a repo
- Jump to at least 10 definitions
- Return using tag stack and jump list
Project 10: The Search-Replace Master
- File: P10-search-replace-master.md
- Main Programming Language: Plain text / code
- Alternative Programming Languages: N/A
- Coolness Level: Level 3: Batch Editor
- Business Potential: Level 4: Cleanup Accelerator
- Difficulty: Level 2: Intermediate
- Knowledge Area: Ex commands + regex
- Software or Tool: Vim 9+ / Neovim
- Main Book: “Practical Vim” by Drew Neil
What you will build: A set of batch substitutions and transformations across a file.
Why it teaches Vim motions: It applies Ex commands and regex to real-world edits.
Core challenges you will face:
- Writing safe substitutions -> Ex Commands
- Using ranges correctly -> Ex Commands
- Combining search with change -> Search & Find
Real World Outcome
You will normalize a messy file using substitutions with confirmation and ranges.
For CLI projects - show exact output:
$ vim messy.txt
Before (excerpt):
User: 42,  Name: Ada
User: 7,   Name: Grace
User: 99,  Name: Linus
After (excerpt):
Ada (id=42)
Grace (id=7)
Linus (id=99)
The Core Question You Are Answering
“How do I transform a whole file safely with one command?”
Concepts You Must Understand First
- Ranges (
:%,:1,10)- How do you scope a substitution?
- Book Reference: “Practical Vim” - Ch. 14
- Regex patterns
- How do you capture and reorder groups?
- Book Reference: “Practical Vim” - Ch. 14
- Confirm flag (
c)- Why confirm substitutions in risky edits?
- Book Reference: “Practical Vim” - Ch. 14
Questions to Guide Your Design
- Is the range correct (whole file vs selection)?
- Do I need confirmation to prevent mistakes?
- Can I use
\vto simplify the pattern?
Thinking Exercise
Write a substitution that swaps “Last, First” to “First Last” on a selected range.
Questions to answer:
- Which capture groups do you need?
- How will you avoid overmatching?
The Interview Questions They Will Ask
- “What does
:%smean?” - “How do you confirm each replacement?”
- “What is the difference between
:gand:v?” - “When should you use
\v?”
Hints in Layers
Hint 1: Start with :%s
Then narrow the range if needed.
Hint 2: Use confirm
Add c for safety during learning.
Hint 3: Simplify regex
Use \v to reduce escaping.
Hint 4: Validate
Use :g/pattern/p to preview matches.
Books That Will Help
| Topic | Book | Chapter |
|---|---|---|
| Substitution | “Practical Vim” | Ch. 14 |
| Global commands | “Practical Vim” | Ch. 15 |
Common Pitfalls and Debugging
Problem 1: “I replaced too much”
- Why: Range or pattern too broad.
- Fix: Use a smaller range or confirm flag.
- Quick test: Run
:g/pattern/pto preview.
Problem 2: “Regex doesn’t match”
- Why: Missing
\vor incorrect grouping. - Fix: Simplify the pattern and test on one line.
- Quick test: Use
:son a single line first.
Definition of Done
- Perform a safe substitution across a file
- Use confirmation and range correctly
- Explain the regex you used
Project Comparison Table
| Project | Difficulty | Time | Depth of Understanding | Fun Factor |
|---|---|---|---|---|
| 1. No-HJKL Navigator | Beginner | Weekend | Medium | 3/5 |
| 2. JSON Surgeon | Intermediate | 1-2 weeks | High | 4/5 |
| 3. Code Refactor | Intermediate | 1-2 weeks | High | 4/5 |
| 4. Markdown Re-Sequencer | Beginner | 1 week | Medium | 3/5 |
| 5. Log Parser | Advanced | 2-3 weeks | Very High | 4/5 |
| 6. HTML Wrapper | Advanced | 2 weeks | High | 4/5 |
| 7. Vim Golf | Expert | 1-2 weeks | High | 5/5 |
| 8. Config Builder | Beginner | 1 week | Medium | 3/5 |
| 9. Code Navigator | Intermediate | 1-2 weeks | High | 4/5 |
| 10. Search-Replace Master | Intermediate | 1-2 weeks | High | 4/5 |
Recommendation
If you are new to Vim: Start with Project 1 to build motion reflexes, then Project 2 to learn structural edits. If you refactor code daily: Start with Project 3 and Project 10 to master repeatable changes and substitutions. If you work with data and logs: Focus on Project 5 and Project 10 for automation and batch edits.
Final Overall Project: The Terminal Editor Playbook
The Goal: Combine Projects 1, 3, 5, 8, and 10 into a single workflow where you can navigate, refactor, automate, and batch-edit a real repository entirely from Vim.
- Build a minimal
.vimrcthat supports your motion workflow. - Generate tags for a real repo and navigate through definitions.
- Refactor a set of functions and variables using operator + motion + dot.
- Convert a log file to CSV with a macro.
- Apply a safe, confirmed substitution across a config file.
Success Criteria: You can perform a full edit workflow in Vim without falling back to mouse selection or external editors.
From Learning to Production: What Is Next
| Your Project | Production Equivalent | Gap to Fill |
|---|---|---|
| Project 1 | Editing logs on a server | Speed and muscle memory |
| Project 3 | Large refactors in a codebase | Consistent rename strategy |
| Project 5 | Incident response log cleanup | Macro robustness and verification |
| Project 8 | Shared dotfiles for a team | Portability and documentation |
| Project 9 | Navigating monorepos | Tag maintenance automation |
| Project 10 | Config normalization | Regex safety and review workflows |
Summary
This learning path covers Vim motions through 10 hands-on projects.
| # | Project Name | Main Language | Difficulty | Time Estimate |
|---|---|---|---|---|
| 1 | No-HJKL Navigator | Text | Beginner | 4-8 hours |
| 2 | JSON Surgeon | JSON | Intermediate | 10-15 hours |
| 3 | Code Refactor | Any | Intermediate | 10-20 hours |
| 4 | Markdown Re-Sequencer | Markdown | Beginner | 6-10 hours |
| 5 | Log Parser | Text | Advanced | 20-30 hours |
| 6 | HTML Wrapper | HTML | Advanced | 15-25 hours |
| 7 | Vim Golf Challenge | Text | Expert | 10-20 hours |
| 8 | Config Builder | Vimscript | Beginner | 6-12 hours |
| 9 | Code Navigator | Any | Intermediate | 10-20 hours |
| 10 | Search-Replace Master | Text | Intermediate | 10-20 hours |
Expected Outcomes
- Navigate by meaning instead of by keystrokes.
- Edit structured text safely using text objects.
- Automate repeated edits with dot and macros.
- Perform batch edits with Ex commands and regex.
Additional Resources and References
Standards and Specifications
- Vim help files:
motion.txt,change.txt,repeat.txt,cmdline.txt,tagsrch.txt,map.txt - Universal Ctags documentation
Industry Analysis
- Stack Overflow Developer Survey (latest IDE usage and admiration data)
Books
- “Practical Vim” by Drew Neil - Practical operator/motion workflows
- “Learning the vi and Vim Editors” by Arnold Robbins et al. - Foundational navigation
- “Modern Vim” by Drew Neil - Practical configuration patterns